Purple Pixel Labs is the indie software studio of Carl Ratcliffe

Coming very soon

A top-down adventure for one hero

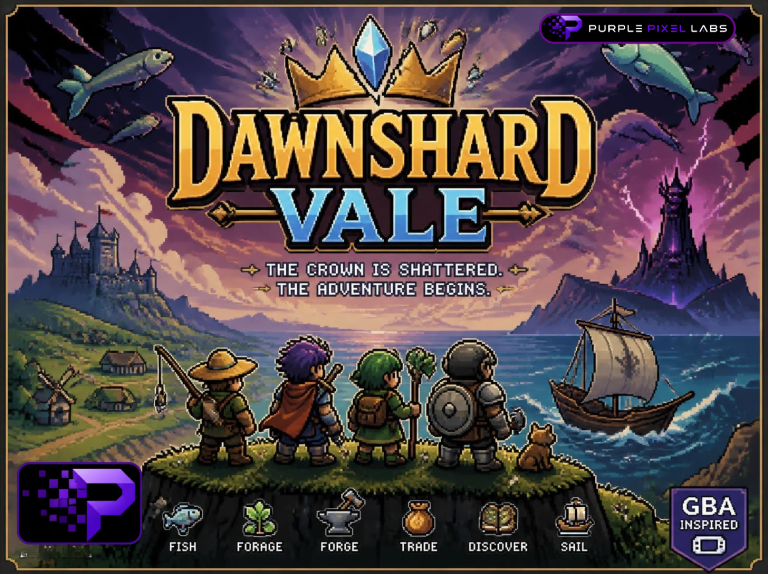
Dawnshard Vale

The Crown of Dawn is shattered and the sky has gone strange. Fish, forage, forge, trade, dig up secrets, and sail the Sundering Sea, and find the Shards before the Dark King does.

20 hidden secrets5 shopkeepers who remember you14 fish species7 wild animals to hunt7 skills to levelDay, night and weather27 music tracksHarbour, sailing and 6 islands15 new questsGamepad ready
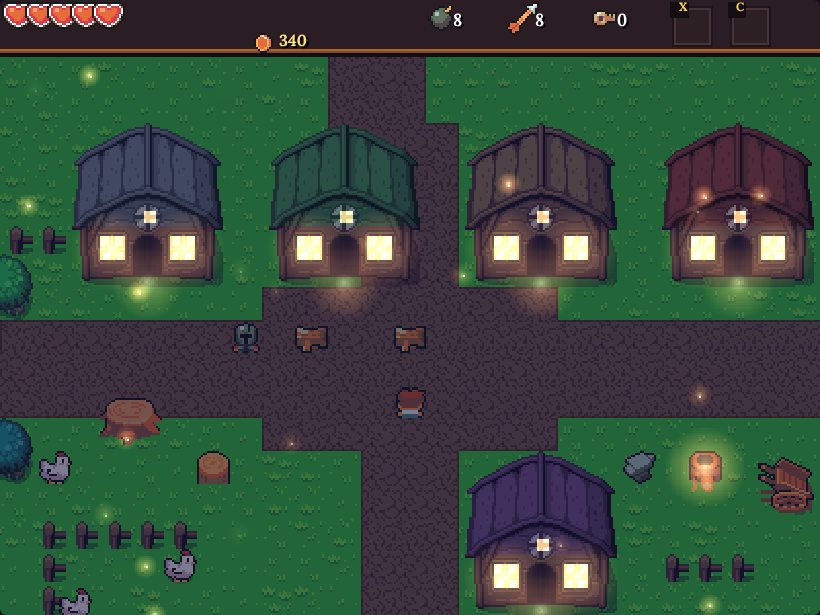
Oakham village at night, windows glowing and fireflies drifting
A village that lives

Villagers with routines, opinions and bedtimes

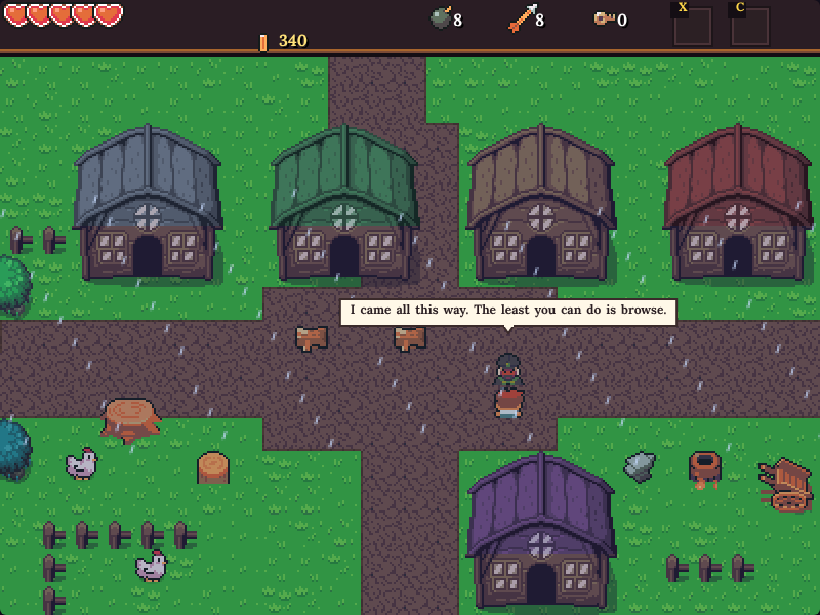
Mara, Kip, Granny and friends wander the square by day, head home when the rain starts, and mutter in speech bubbles as you pass. Shops shut at dusk. At night a lantern-carrying watchman takes over.

  • Chatter changes with weather, time of day and your progress
  • Stores, forge and apothecary close after dark
  • Granny's runaway hen, Biscuit, needs finding
Kip's speech bubble in the village square by day
Weather & night

Showers, storms and firefly evenings

Rain rolls in on some days, with thunder on the wild ones. When the sun sets, windows light up, torches glow and fireflies drift over the grass while the music turns calm.

Rain falling over the village
Rainy day
Village at night
Lamplit night
Combat & magic

Swords, bombs, bows and wands

Spin attacks, bombs for cracked walls, a bow, magic that costs mana, and armour you forge yourself. Hits have real weight: a freeze-frame, a screen shake and a burst of sparks.

  • Hearts, mana and score HUD
  • Sword, armour and charm tiers
  • Food and potion buffs
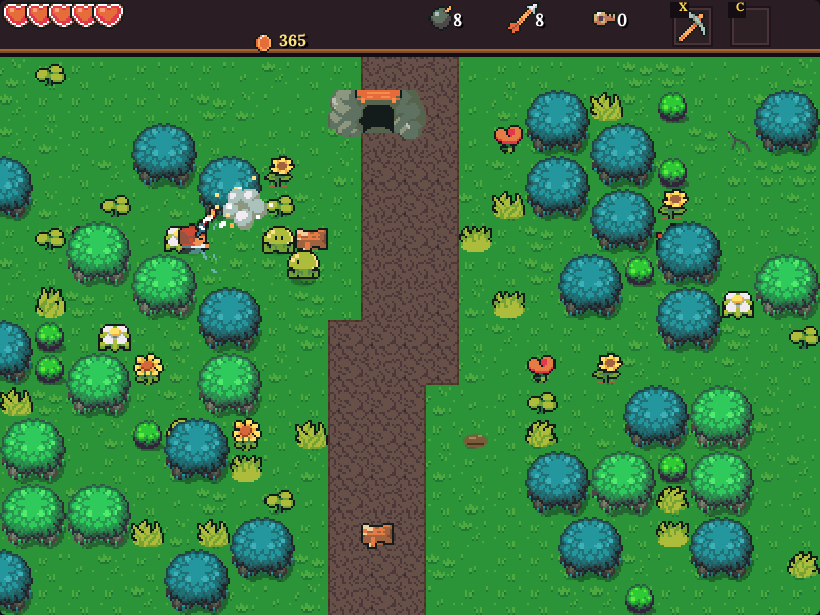
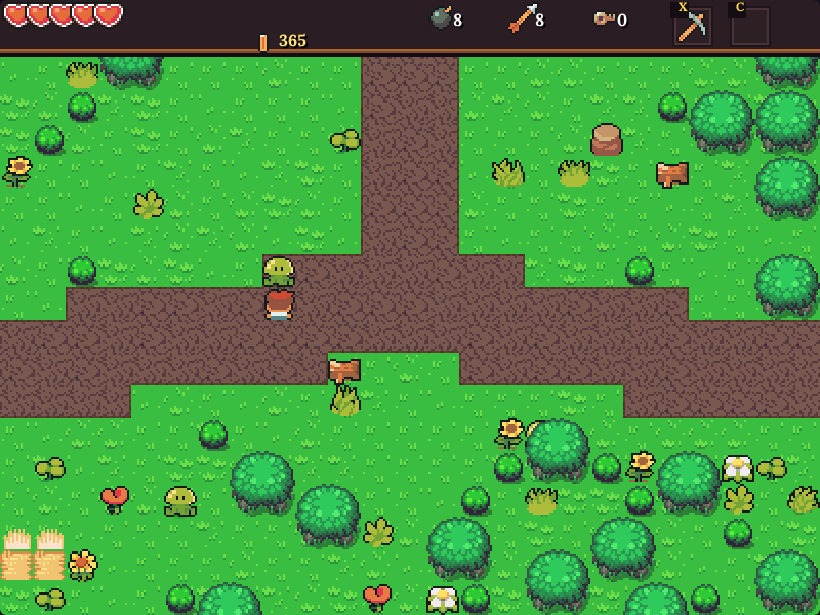
Slimes in Whisper Woods near the crypt entrance

Descend into the Whisper Crypt

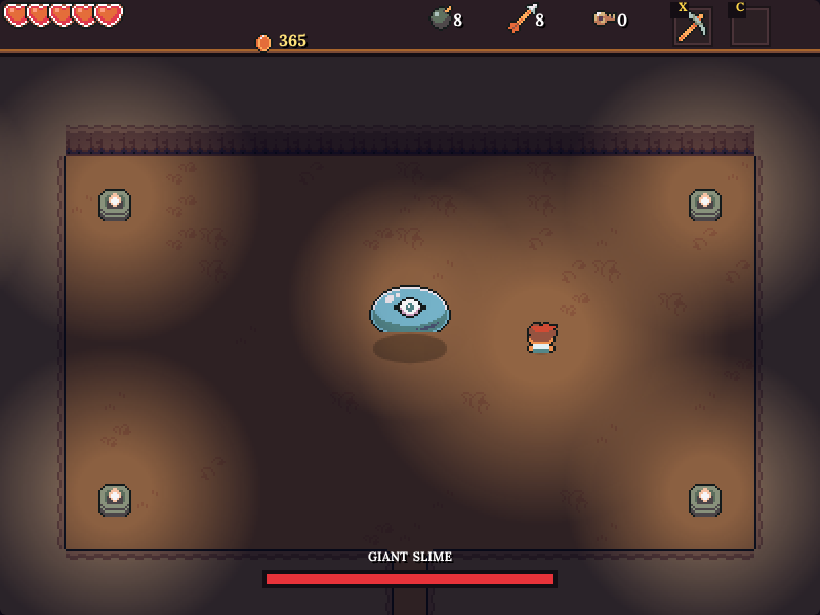
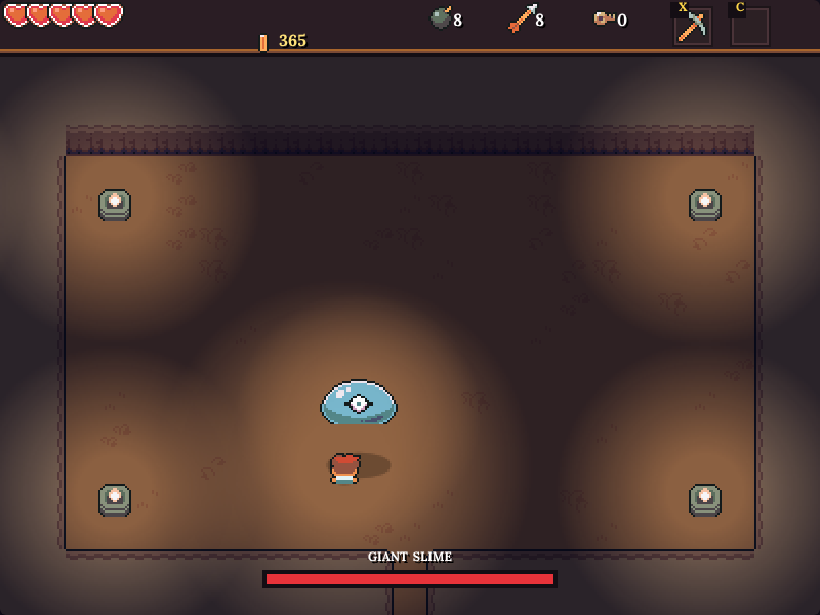
Sealed tombs, a locked boss door and a giant slime who does not appreciate visitors.

Whisper Crypt chamber
Giant slime boss fight

Fishing, properly

Fourteen species across lakes, marshes and mountain streams. What bites depends on where you stand, the time of day and the weather.

Reel it in

Rain brings trout. Night brings catfish. Storms bring something worse.

Look for bubbling hot spots on the water for faster bites and rarer fish. Fighters differ: pike dart, eels leap, and the legendary ones tire slowly. Land a trophy-size catch for a bonus.

  • Bait, shiny lures and a Fishing skill that unlocks bigger fish
  • Strong Line, Fast Reel and Master Rod upgrades at Tomo's
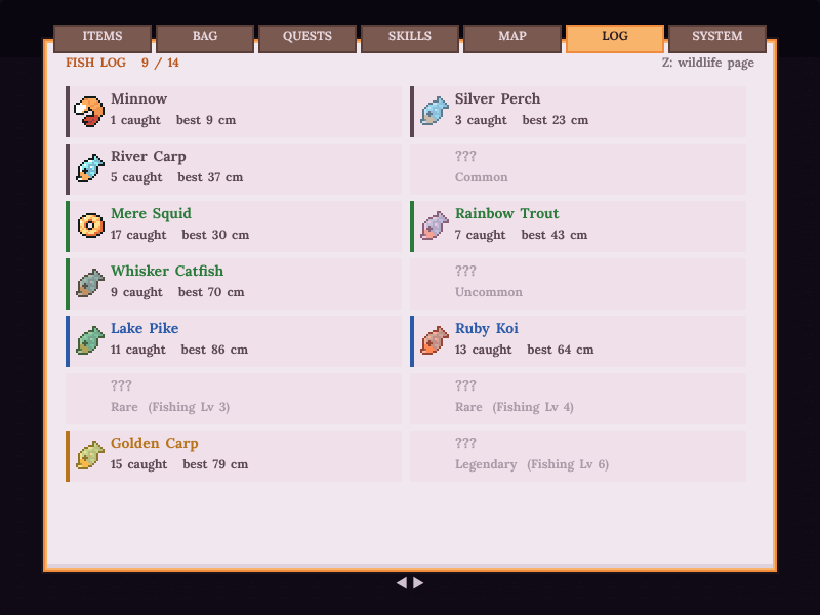
  • A fish log with your best size for every species
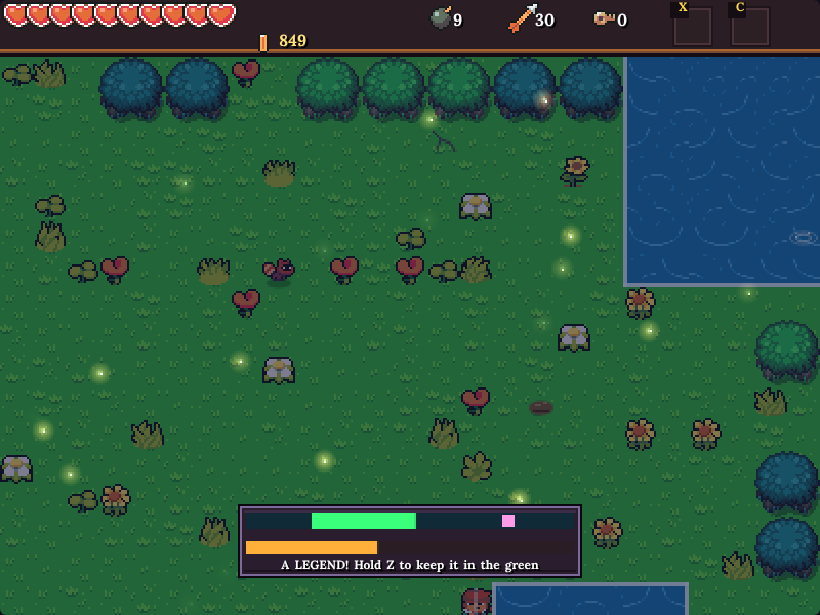
Fighting a legendary fish, the reel bar on screen
A legend on the line
Fish log with species, rarity and best size
Fish log

Hunt the vale

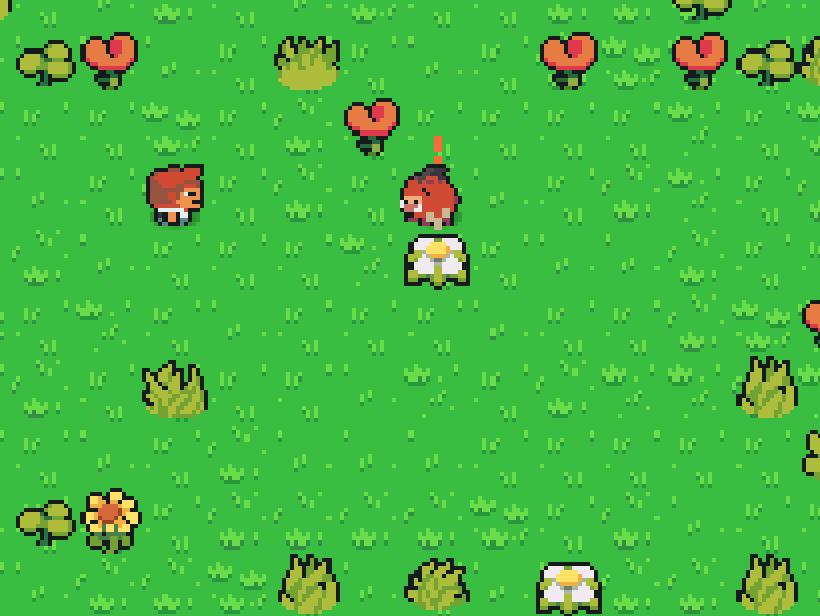
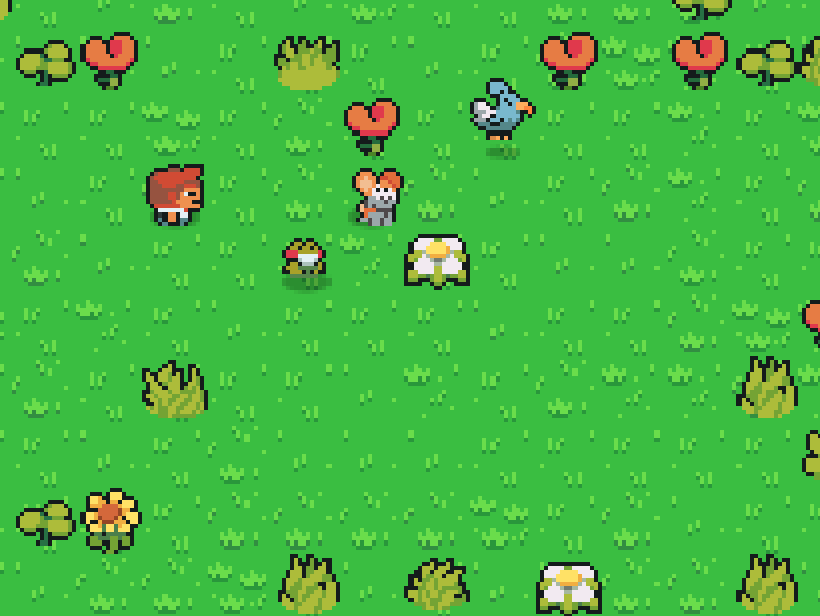
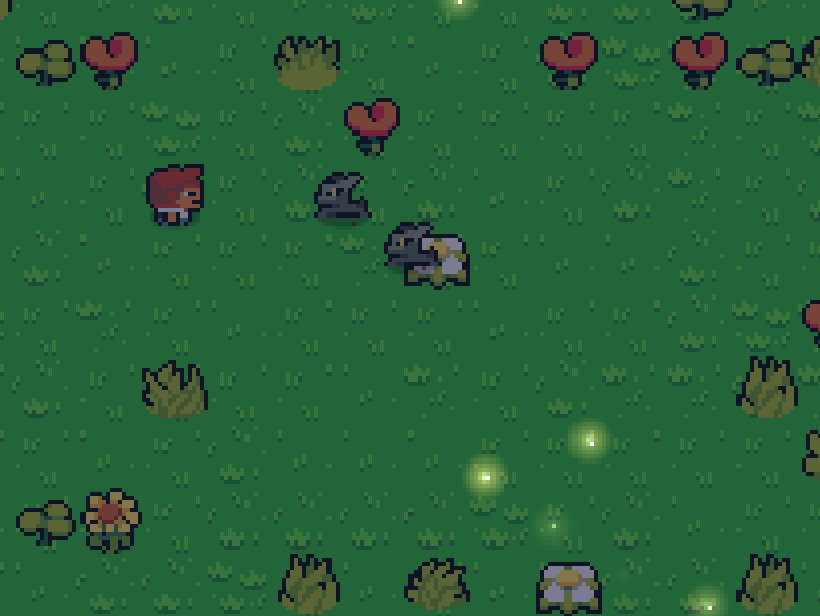
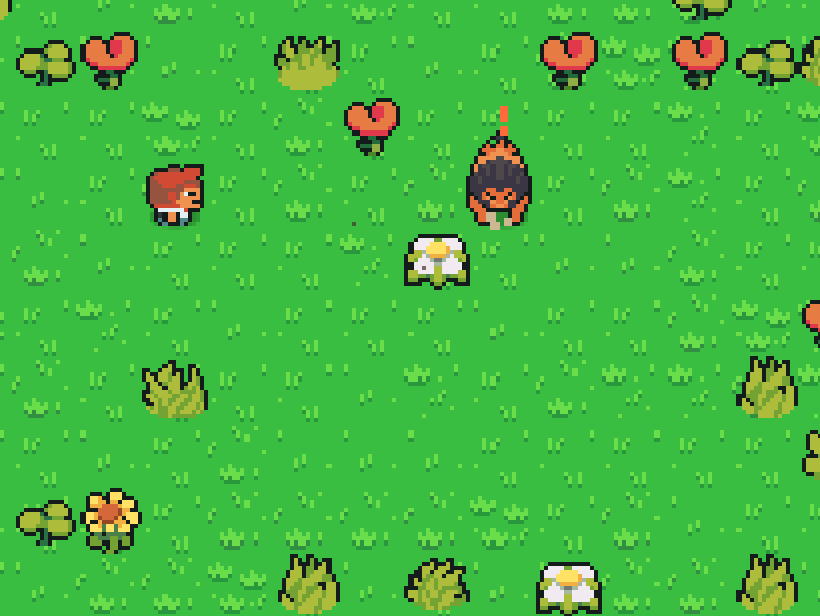
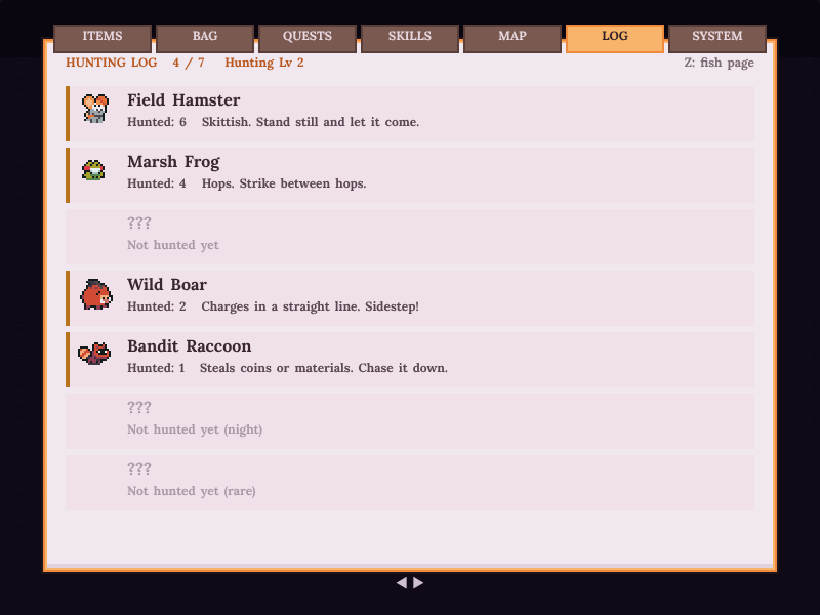
Seven kinds of wildlife with real habits. Stand still and a hamster wanders close. Walk and it bolts. Step aside from a charging boar. Chase down the raccoon that just took your coins.

A wild boar winding up to charge
The boar winds up... then charges in a straight line
Hamster, parrot and frog in a meadow
Small game: hamsters, parrots, marsh frogs
Hyenas at night
Dusk hyenas hunt in packs after dark
A mountain lion about to charge
The rare mountain lion, a true trophy
Hunting log
Hunting log
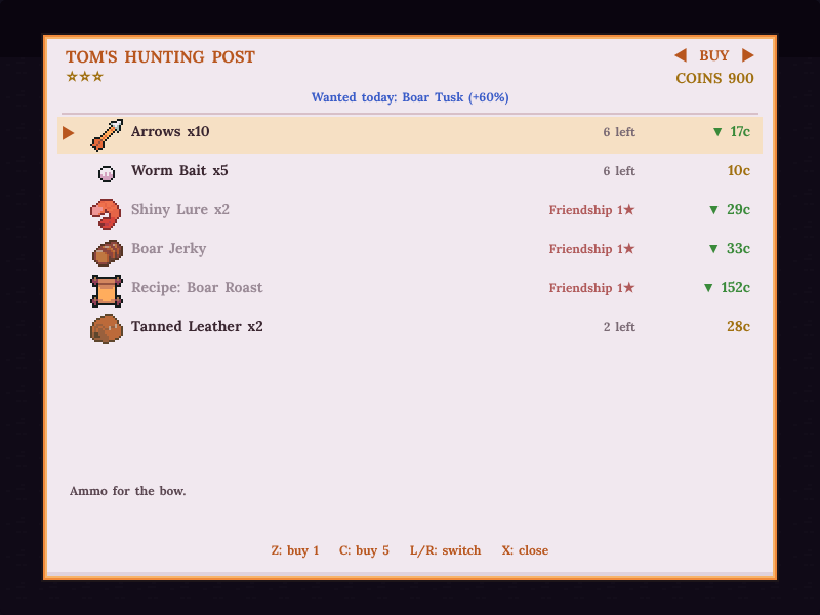
Tom's Hunting Post
Sell pelts and tusks at Tom's
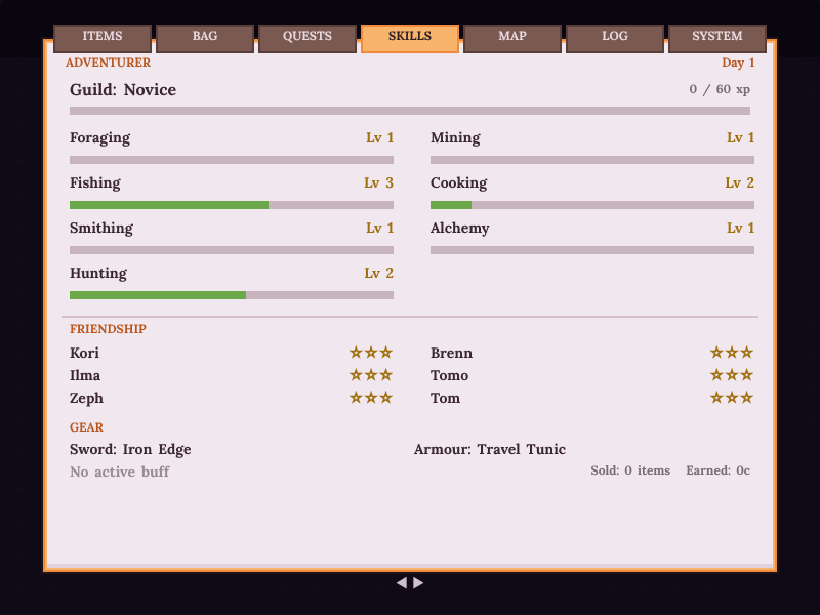
Skills screen with the new Hunting skill
Hunting skill, Lv 1 to 10

Pelts, tusks, plumes

Craft jerky, boar roast and frog skewers. Sell the rest.

Tom's daily challenge

A different fish or beast every day, with coins and favour.

Master hunter

Hunt every species, including the lion, for a Piece of Heart.

Dig. Discover. Fish.

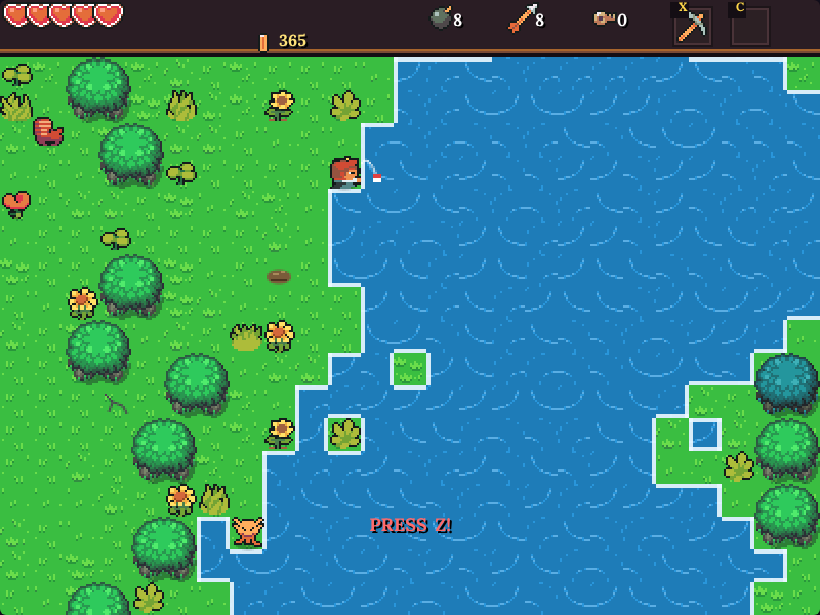
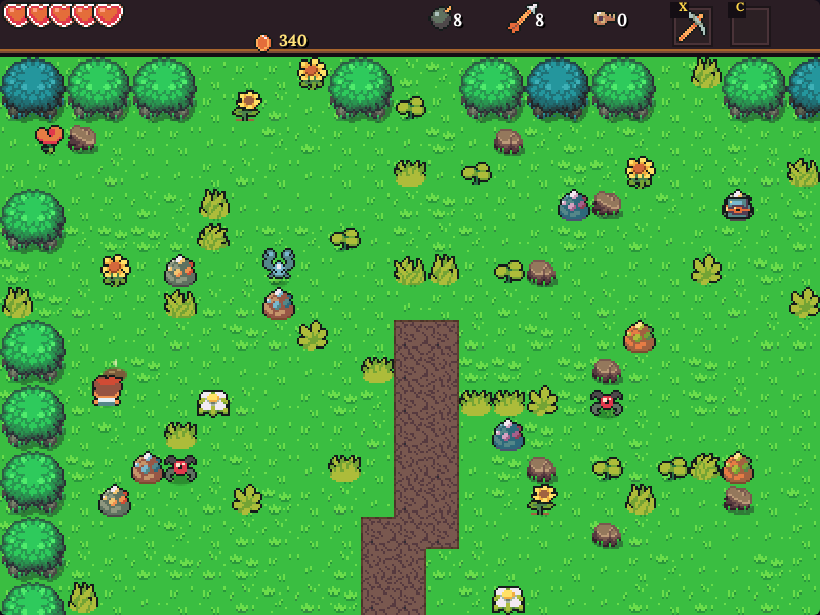
Wait for the bite, then press Z. Night-time fish are bigger. And keep a pickaxe handy: soil that looks lumpy is hiding something.

Fishing at the lake, bite alert on screen
Fishing, with bait and a skill
A mound of loose soil glinting
A glint in the soil...
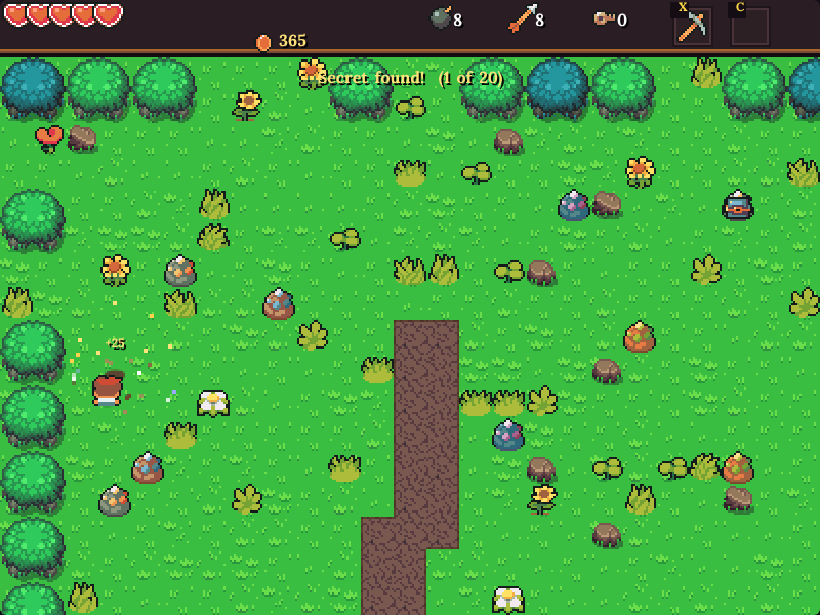
Secret found toast
...and a secret found
Crafting

Cook it. Forge it. Brew it.

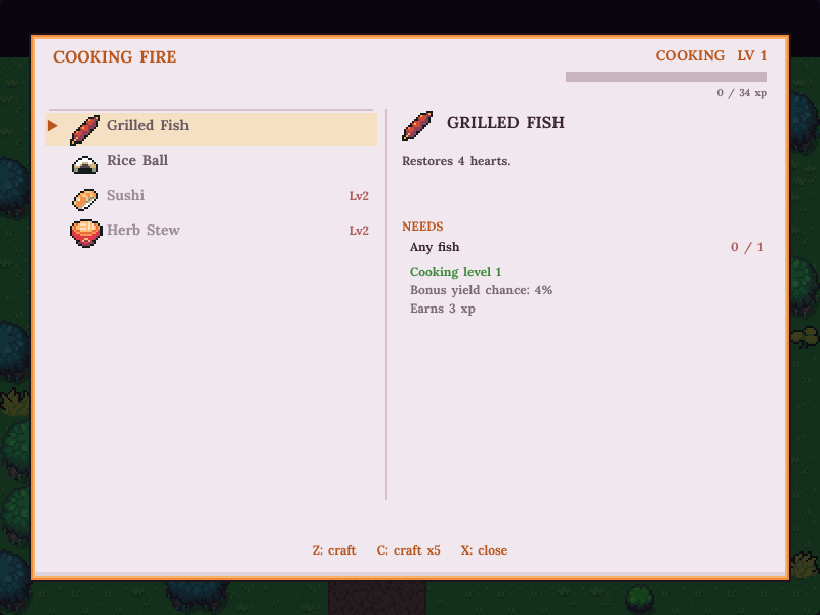
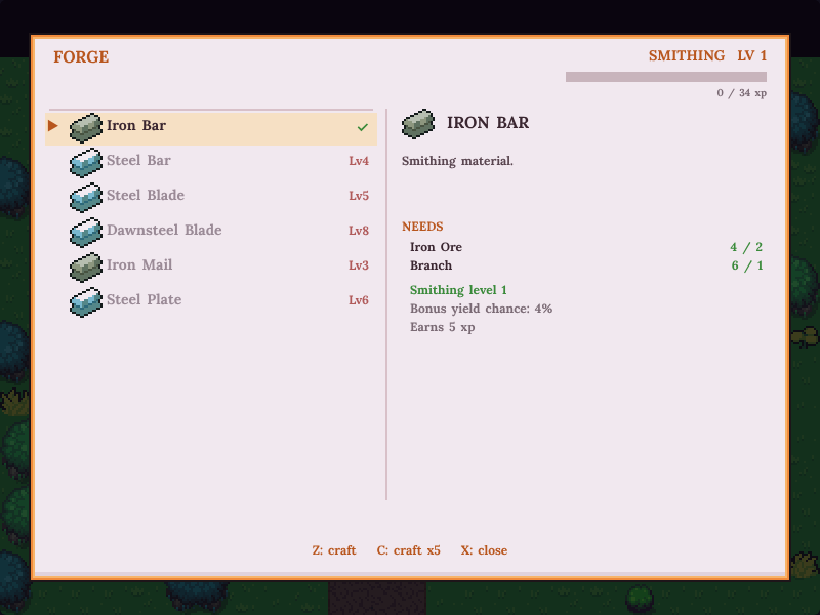
Four crafting stations, each with its own recipes and skill. Cook fish for healing meals, smelt ore into bars, forge blades and armour, brew potions at the apothecary cauldron.

  • Learn recipes from merchants
  • Skill levels raise bonus yield
  • Better gear unlocks harder work
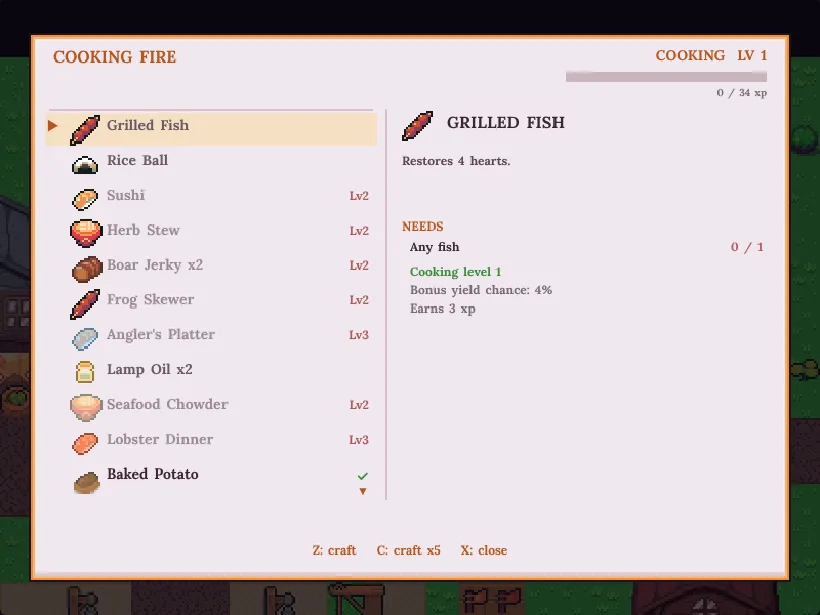
Cooking menu
Forge menu
Trade like it's an MMO, for one

Sellers with memory, moods and stock

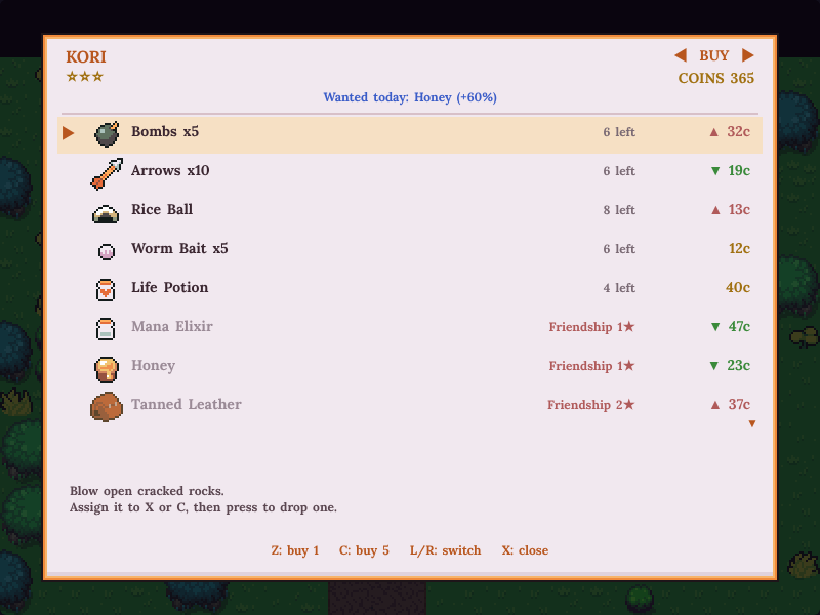
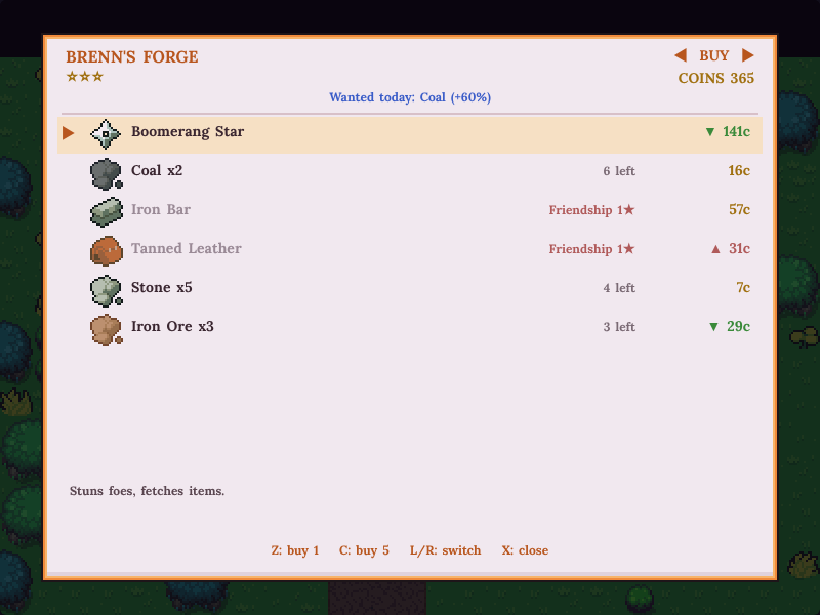
Prices drift day to day, shops rotate their wares and every merchant tracks your friendship. Sell too many of one thing and the price sags. Befriend Kori, Brenn or Ilma and rarer goods appear.

  • Buy, sell, barter and give gifts
  • Wandering peddler with rare stock
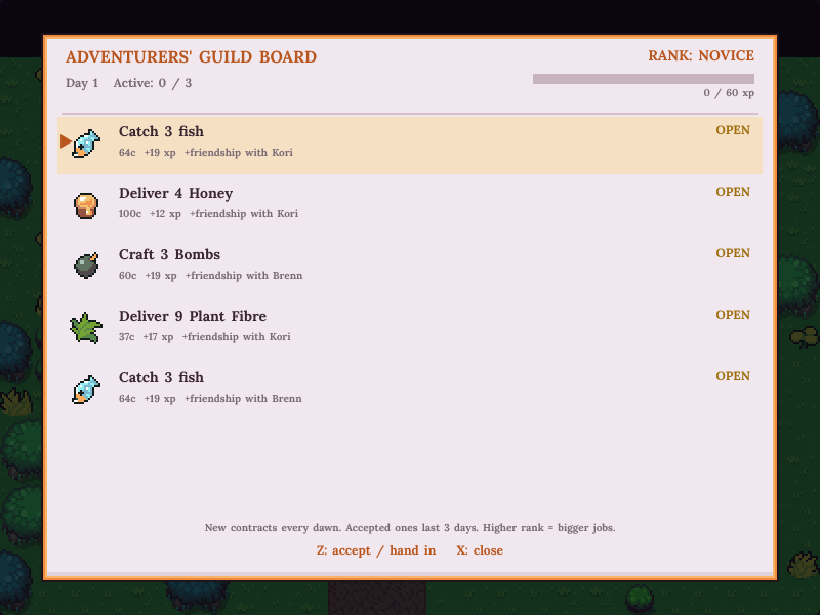
  • Guild board with daily contracts and ranks
Kori's general store
Brenn's forge shop
Adventurers' Guild board
Guild contracts
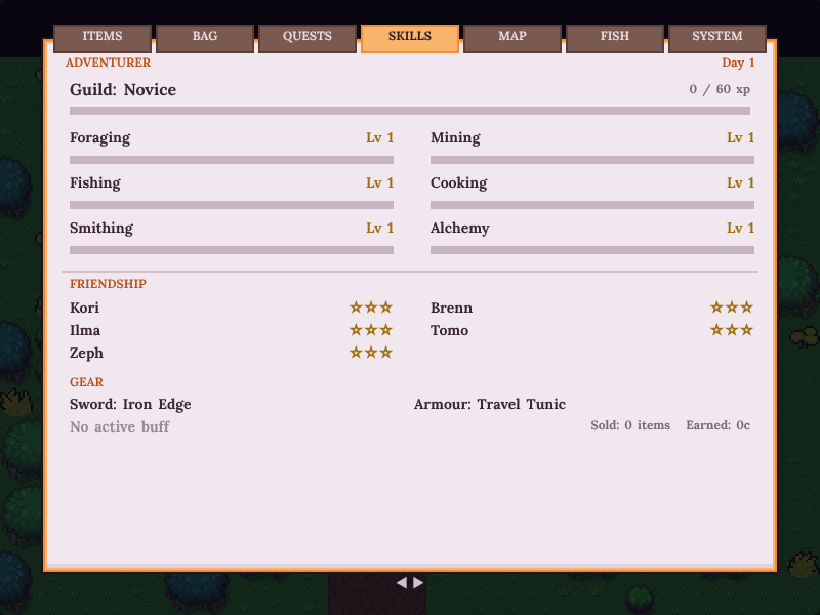
Skills and friendship screen
Skills, friendship, gear
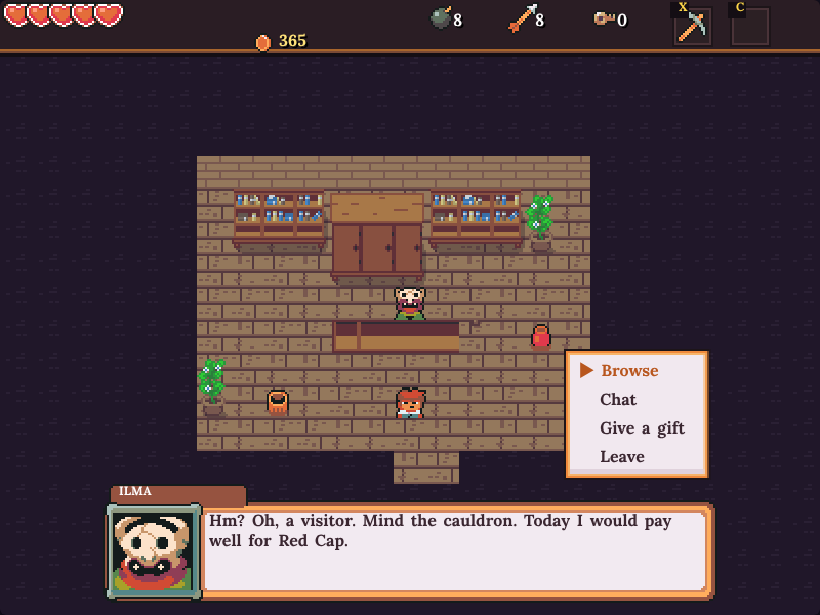
Ilma the apothecary talking
Chat, browse or give a gift

A vale worth walking

Forests, a lake, mountain foothills, highland ruins and a village with a house for everyone.

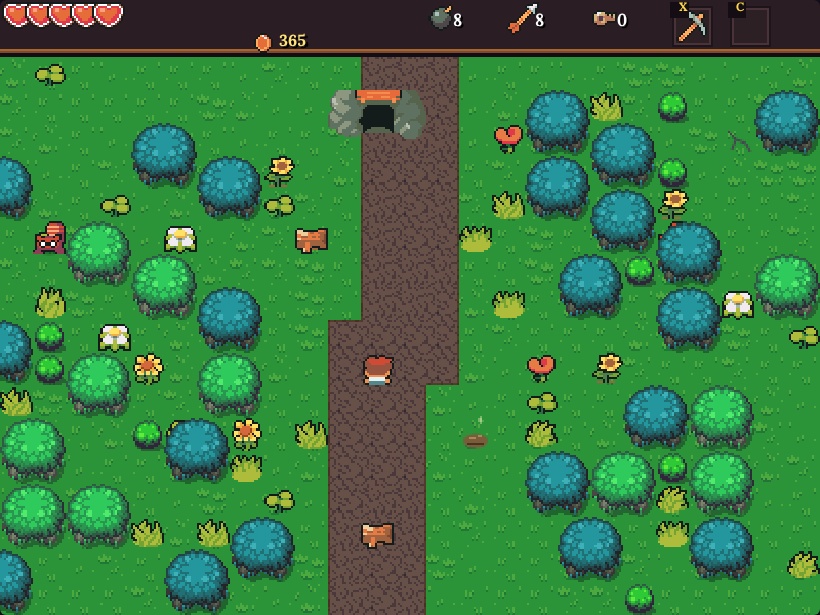
Whisper Woods
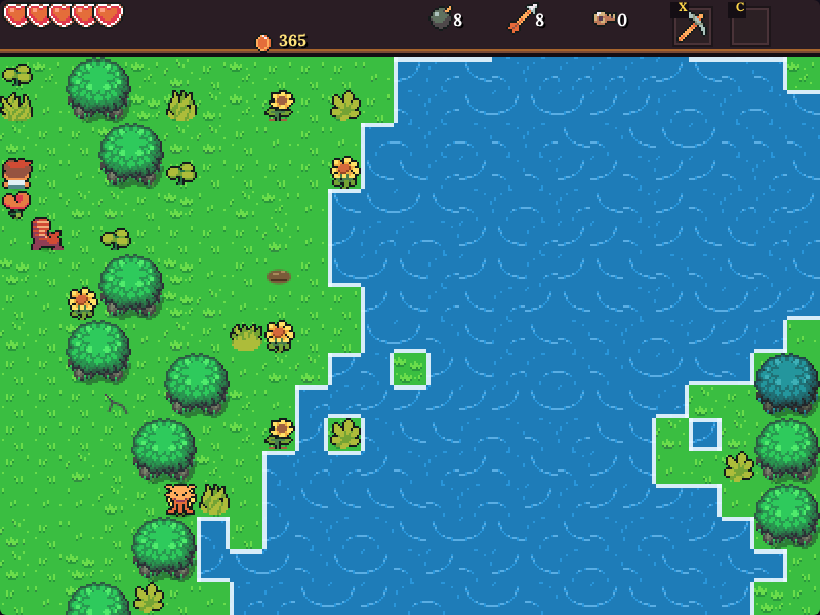
Lake Mere
Stonepeak foothills
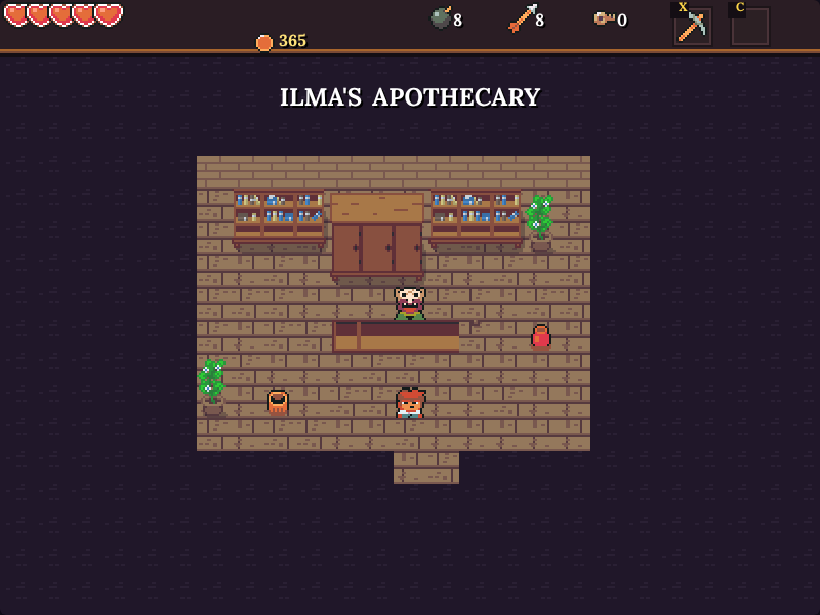
Inside Ilma's Apothecary
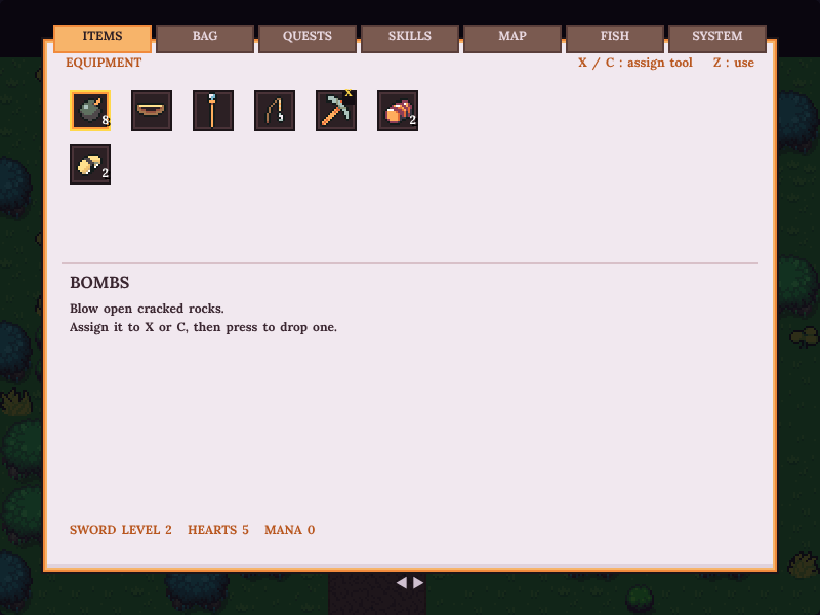
Inventory and tool menu
New: chapter two

Saltmere Harbour, and a whole sea beyond it

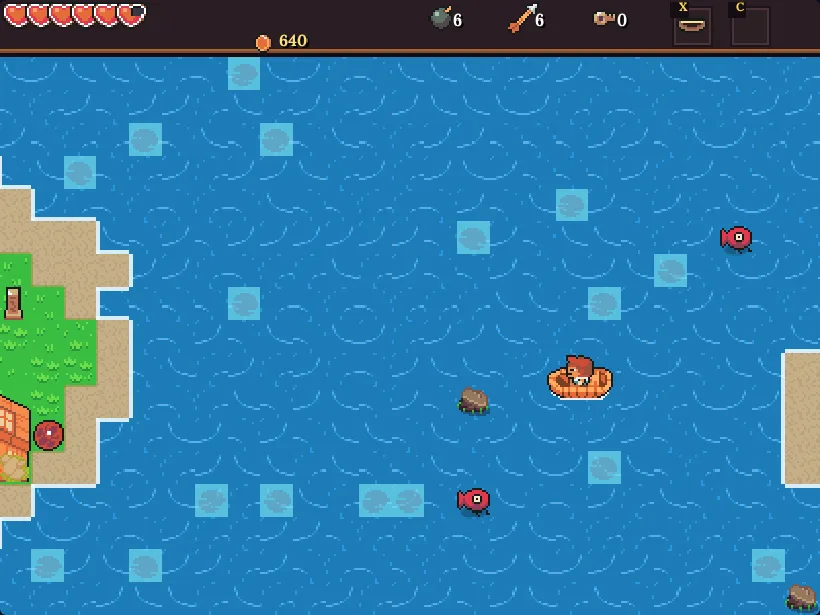
Follow the south-east road to a working port: piers, a lighthouse, a tavern with a bard, a fish market, a boatyard and a warehouse full of rats. Then fix up the old rowboat and sail out onto the Sundering Sea.

  • Fifteen new quests, from a stranded boy to a ghost captain
  • Fish, fight and fire your bow from the deck
  • A timed buoy regatta with bronze, silver and gold
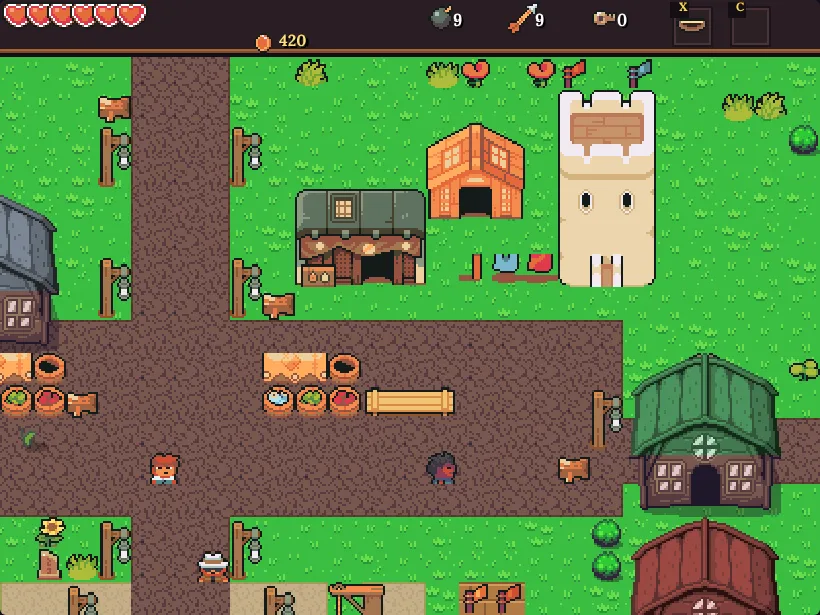
Saltmere Harbour with its lighthouse and fish market

Islands to find

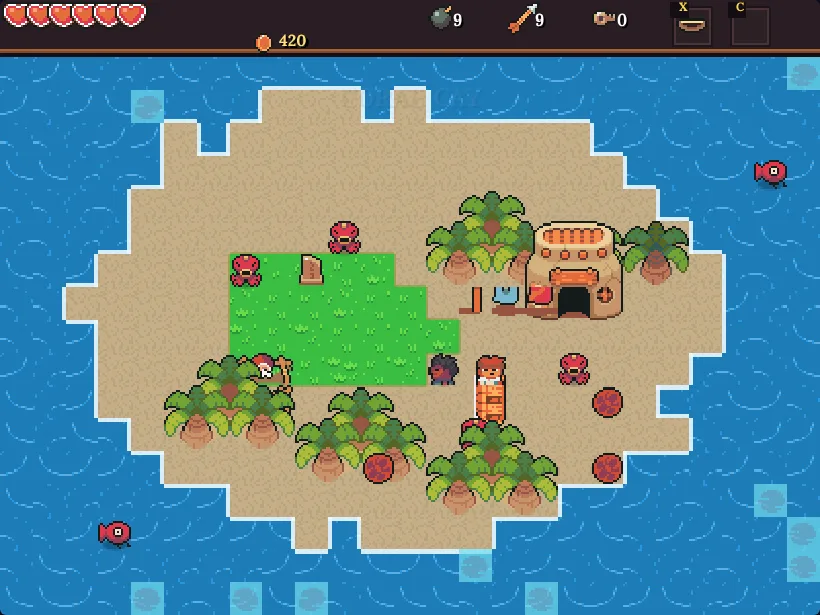
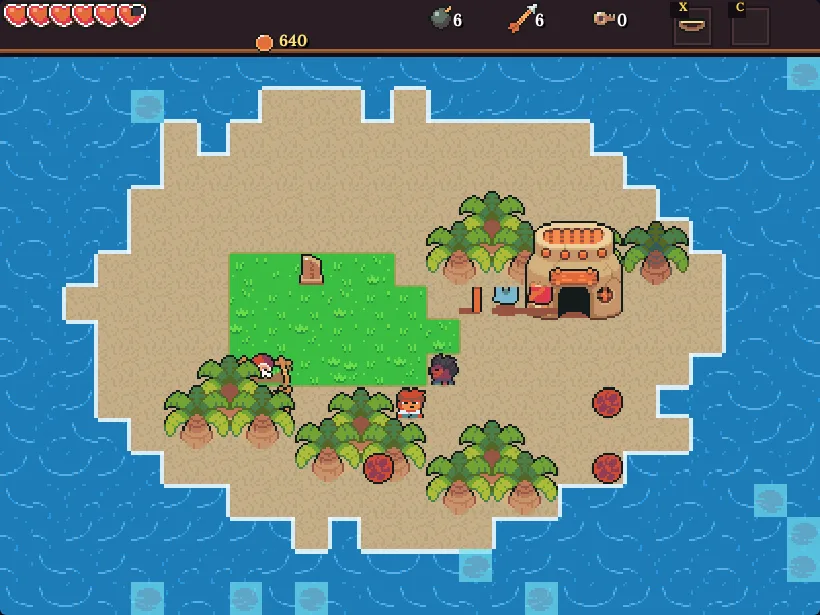
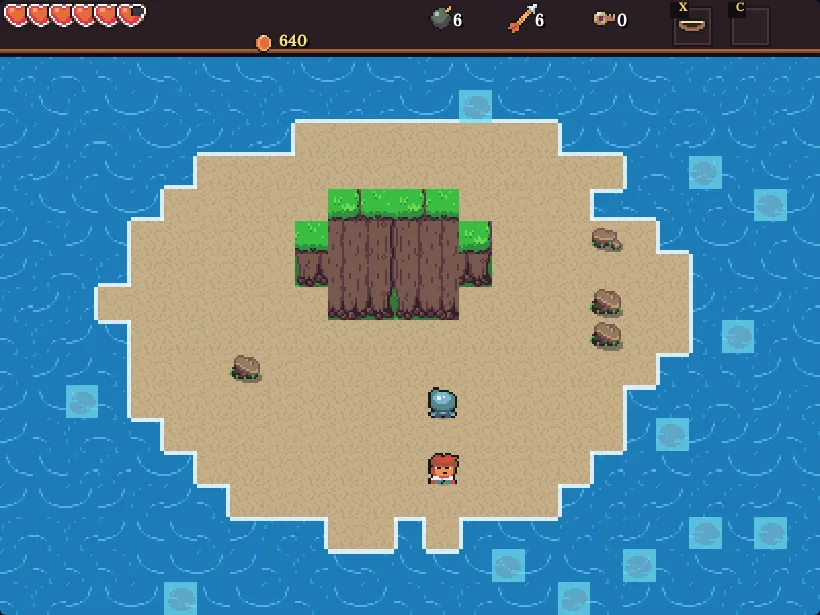
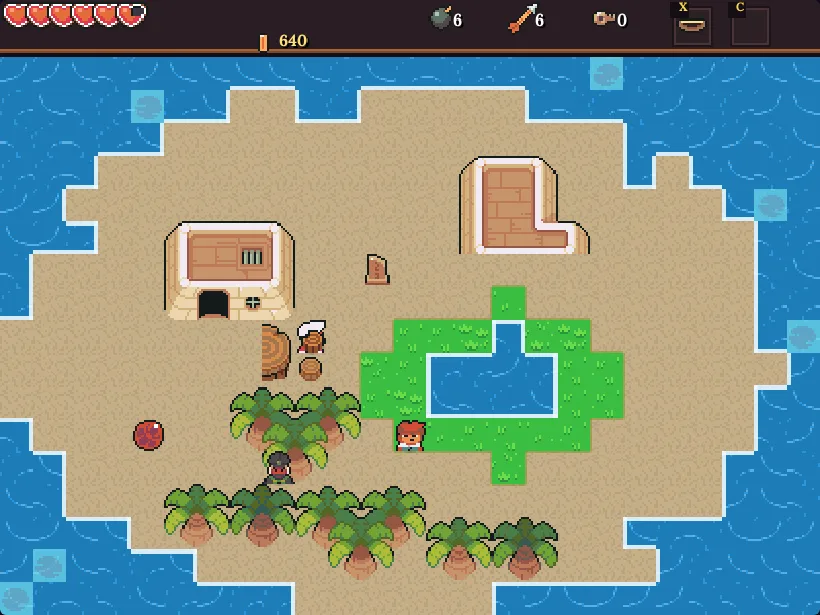
Lantern Isle, Coral Cay, Whale Rock, Mistral Isle, Bonewreck Cove and the Sunken Shrine. Each has its own people, secrets and a reason to come back.

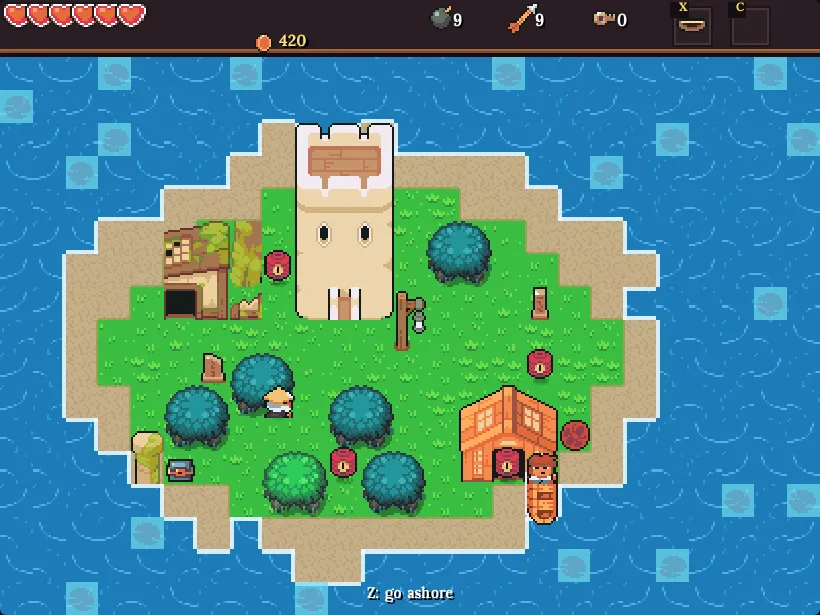
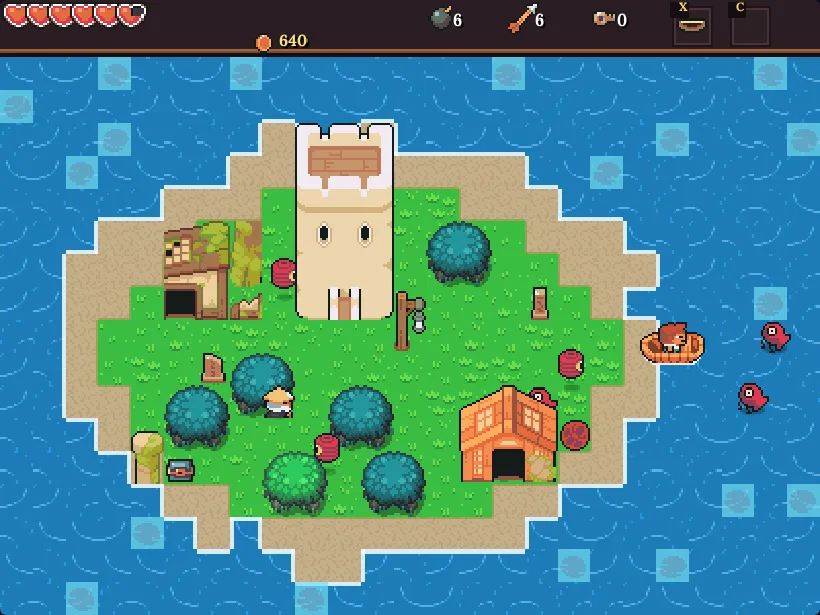
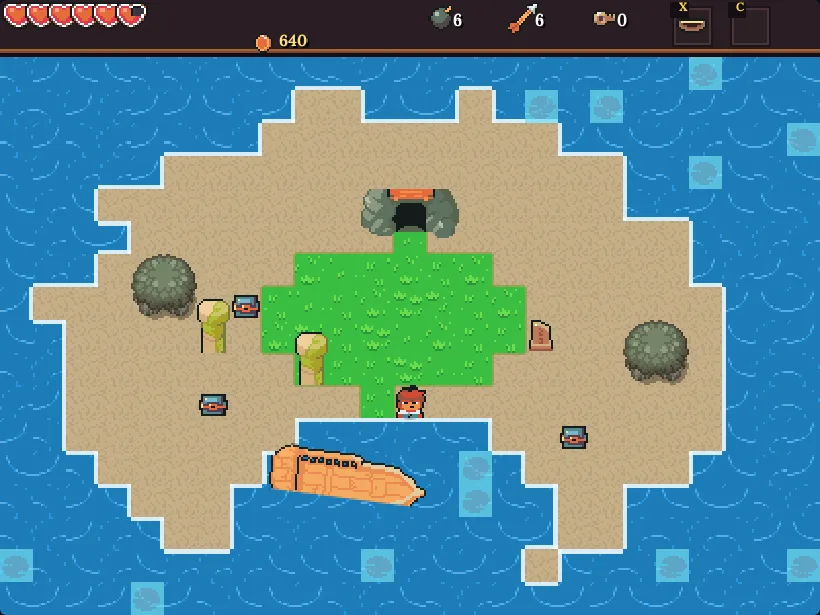
Sailing to Lantern Isle
Lantern Isle: the last wisps
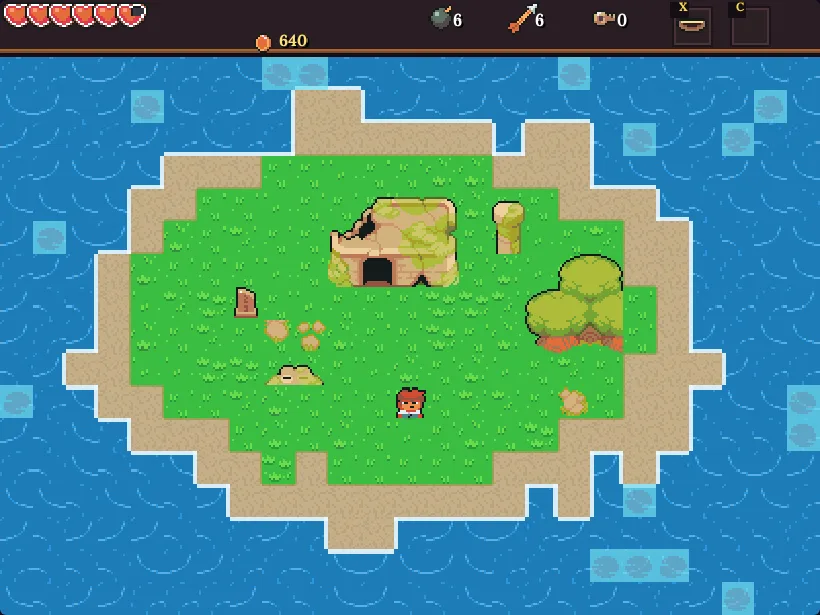
Coral Cay with palms and a pearl diver
Coral Cay: pearls and buried treasure
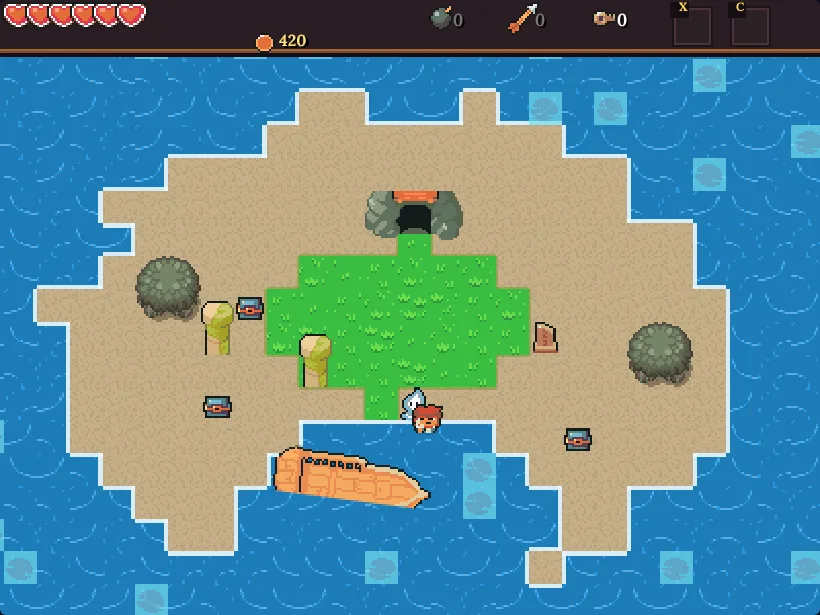
Bonewreck Cove with a wrecked ship
Bonewreck Cove: a ghost ship and its grotto

A harbour with a night life

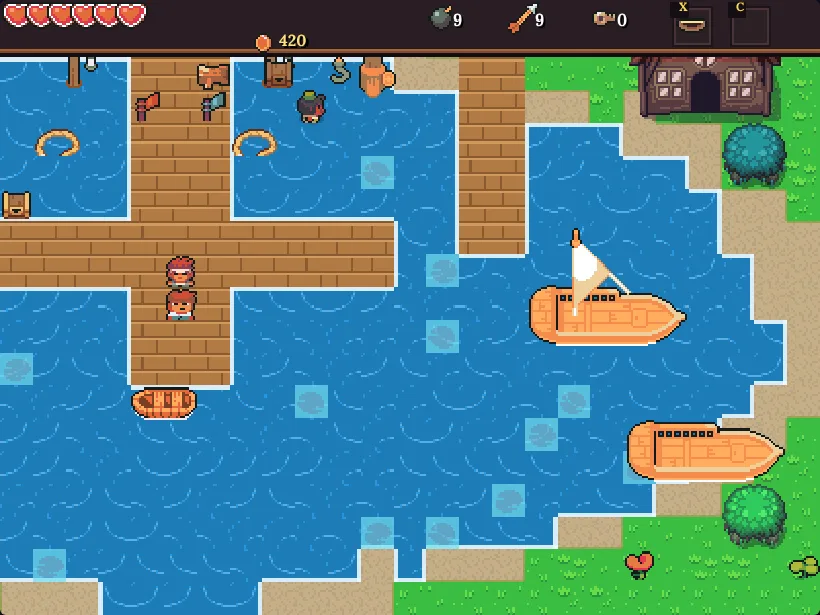
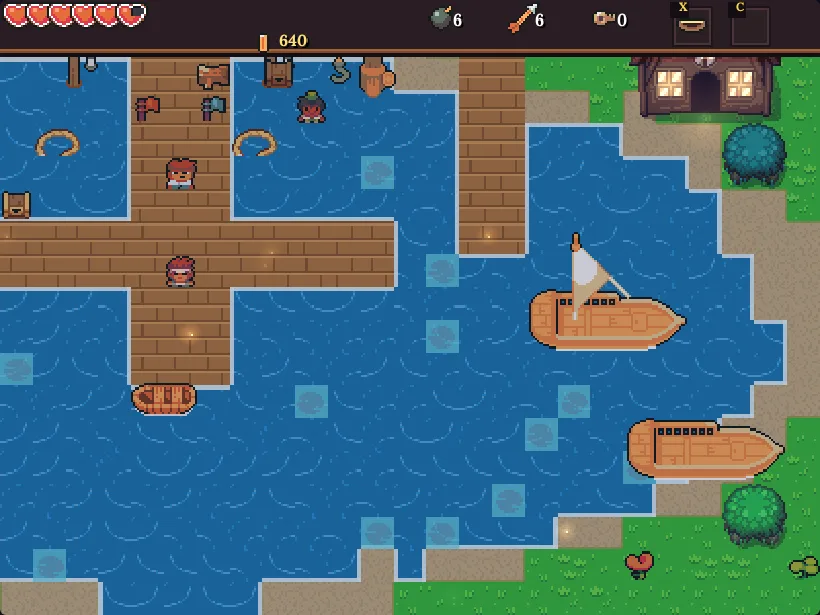
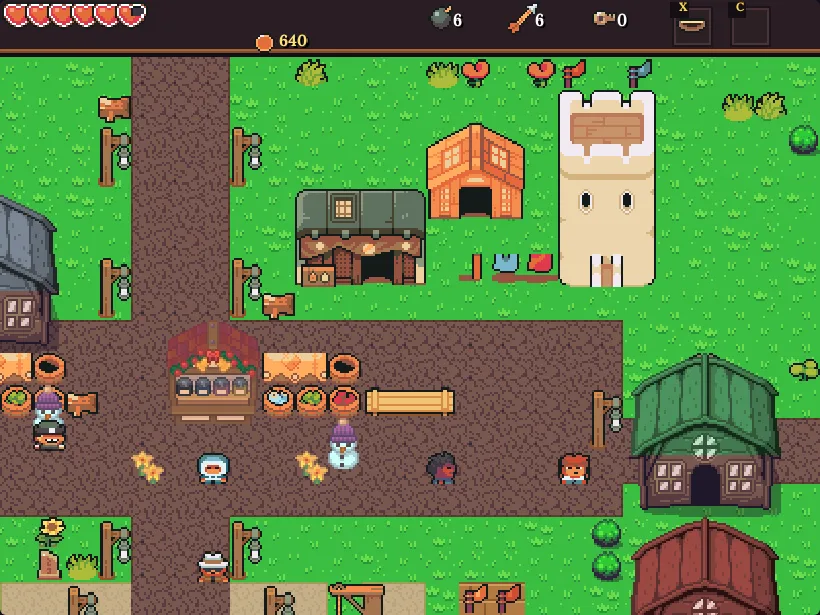
The harbour piers by day
The quay by day
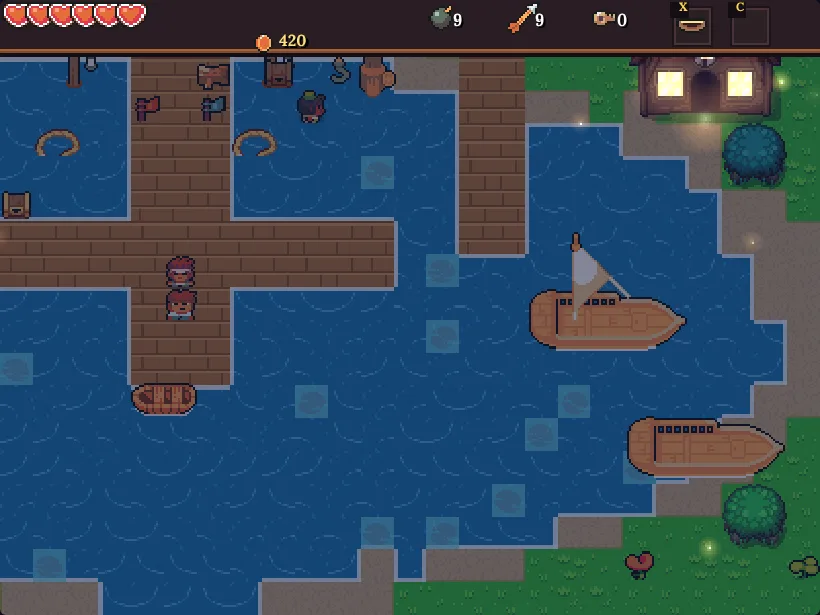
The harbour at night with lantern light
And by night
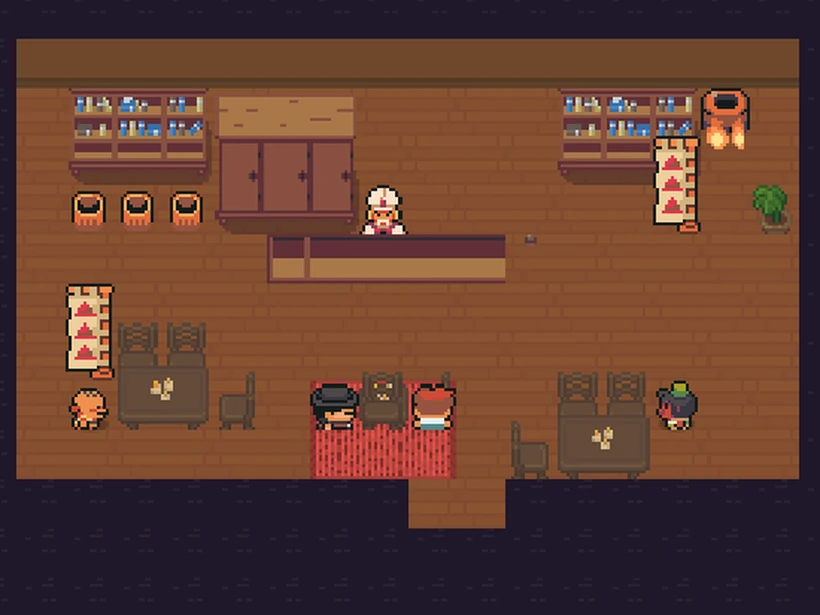
The Drowned Lantern tavern
The Drowned Lantern, where Pip sings
Lore and backstory

A fallen star, a broken crown and a sunken city

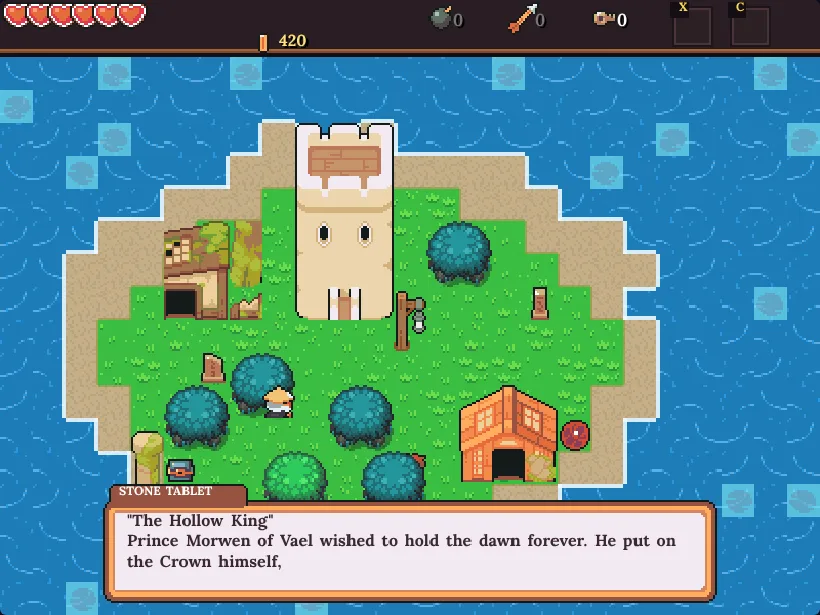
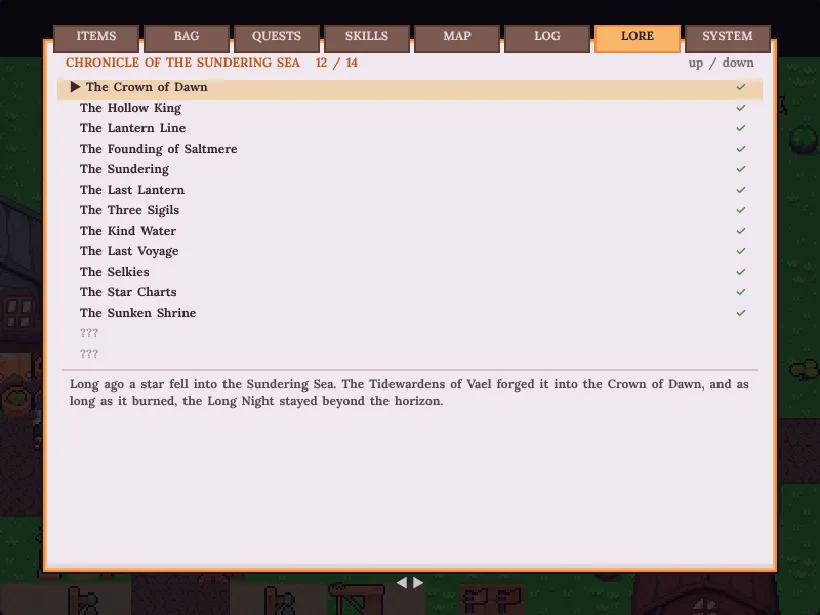
A star fell into the Sundering Sea and the Tidewardens of Vael forged the Crown of Dawn. Prince Morwen wore it, it broke into three Shards, and he became the Hollow King. Read ancient tablets, listen to the people of the coast and fill in the Chronicle, fourteen entries in all.

  • Stone tablets across the harbour and islands
  • A Chronicle tab in your menu that fills as you learn
  • Three Sigils, a sealed shrine and a kraken that was once a friend
Reading a stone tablet about the Hollow King

Chart your course

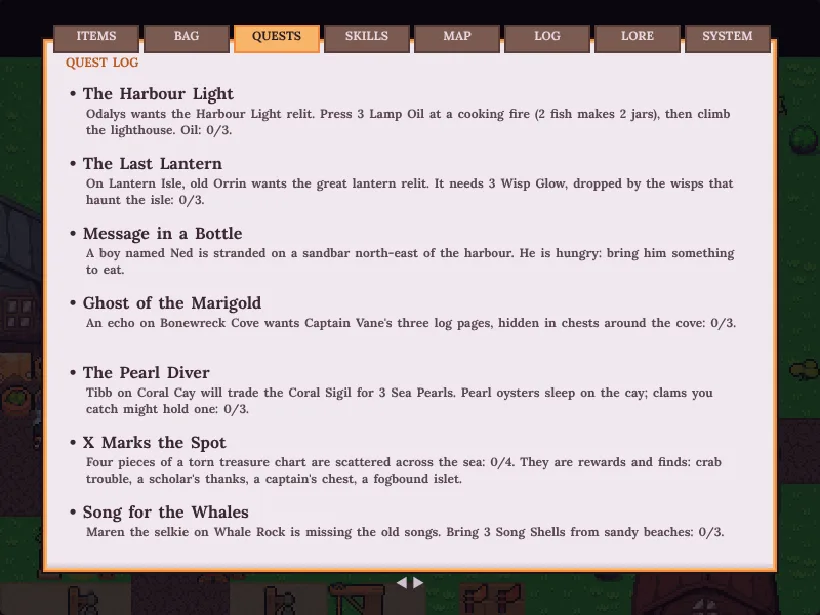
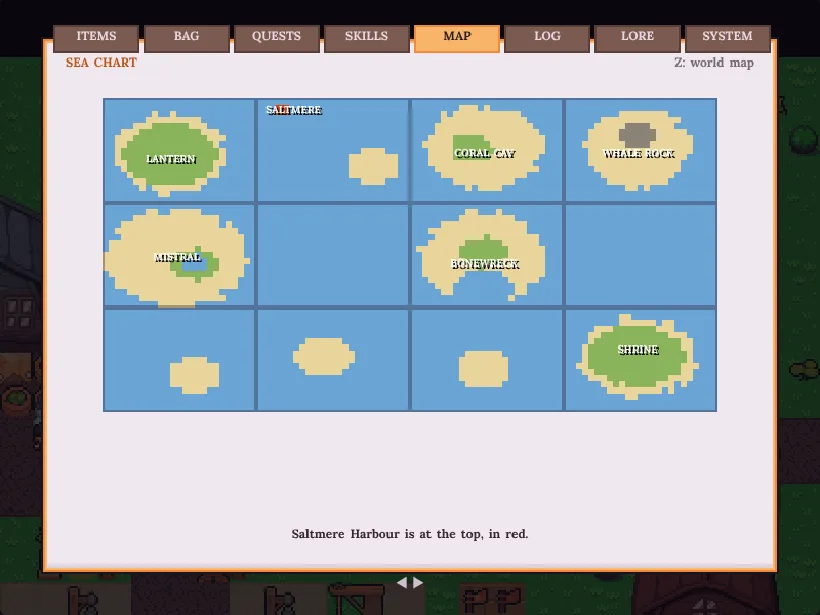
The menu keeps your quests, your Chronicle and a sea chart that fills in as you sail.

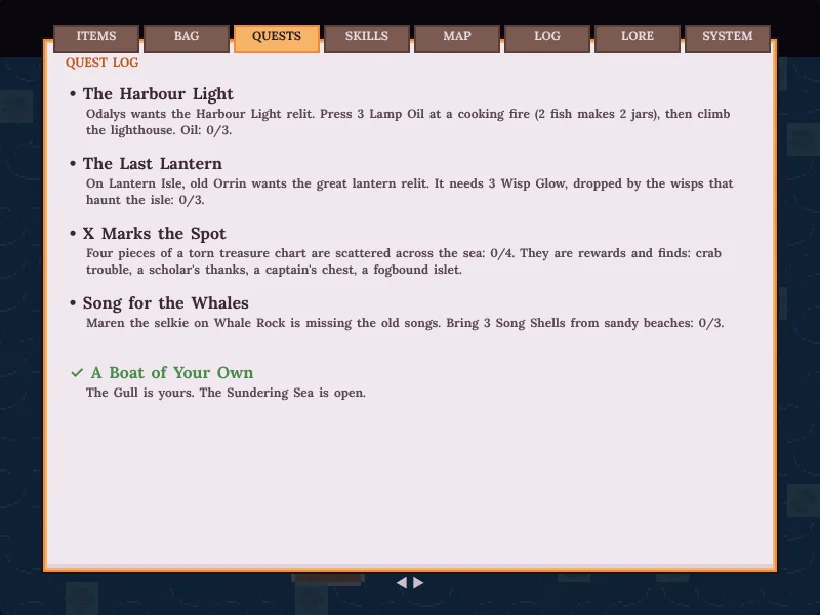
Quest log
Quest log
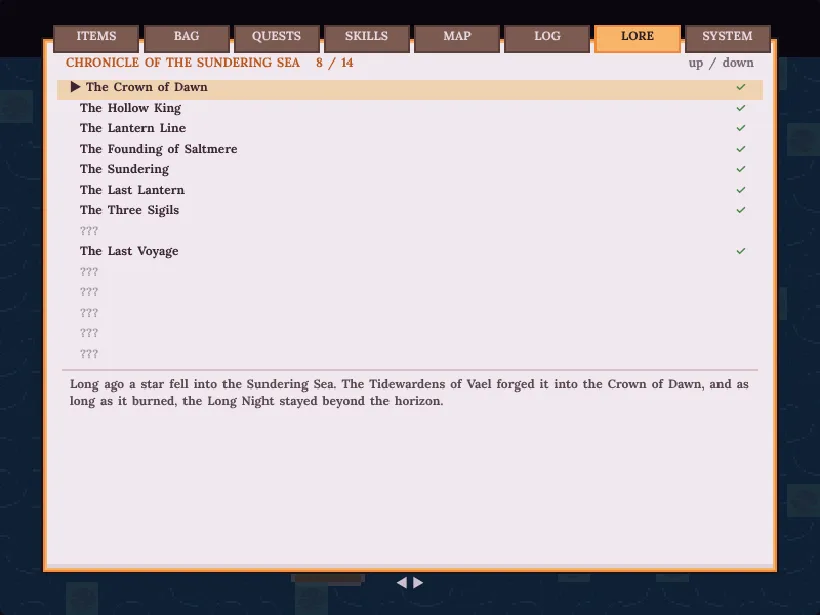
The Chronicle of the Sundering Sea
The Chronicle
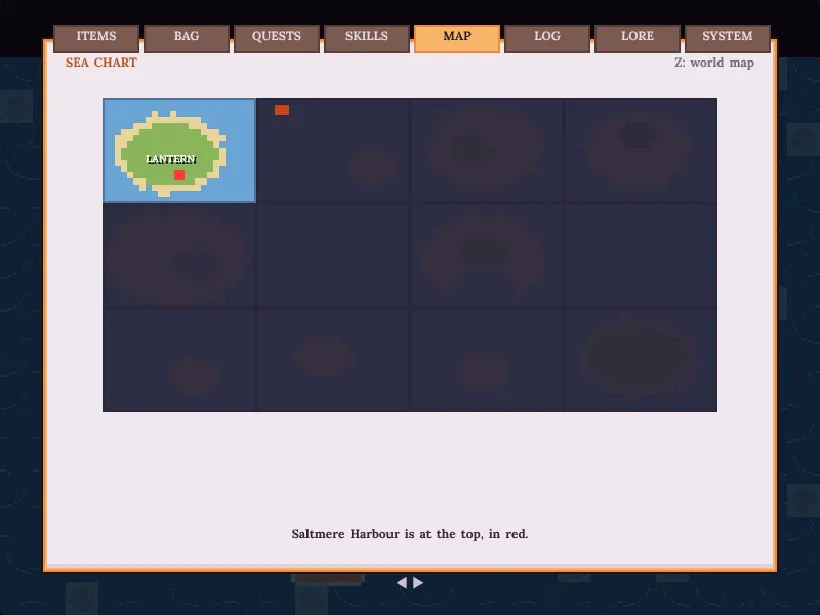
The sea chart
The sea chart

Two more bosses

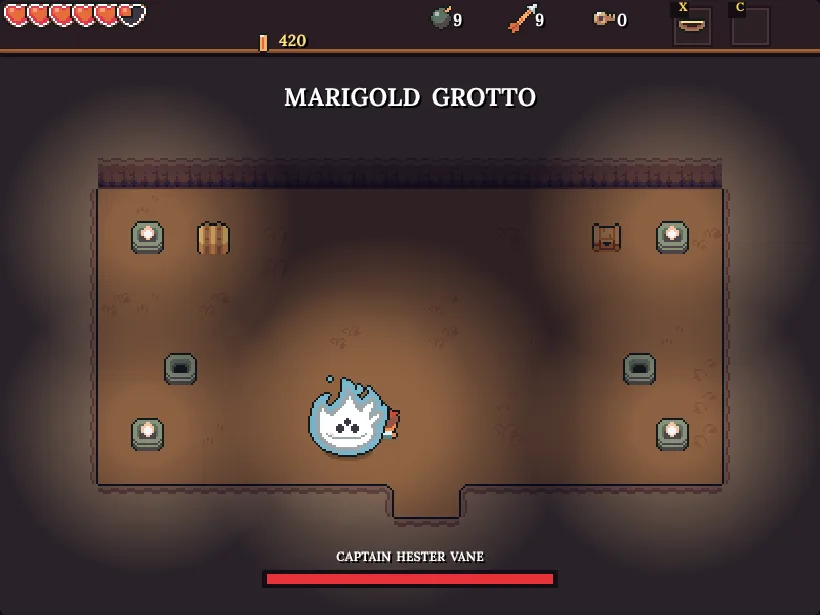
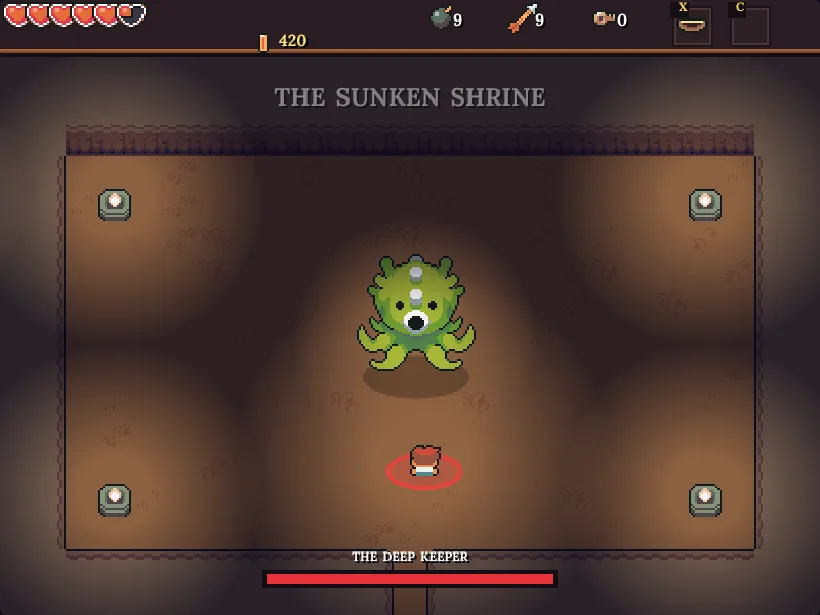
Free a ghost captain in her grotto, then take on the Deep Keeper in the Sunken Shrine for the second Shard of Dawn.

Captain Hester Vane in the Marigold Grotto
The Deep Keeper in the Sunken Shrine

Festive extras and new catches

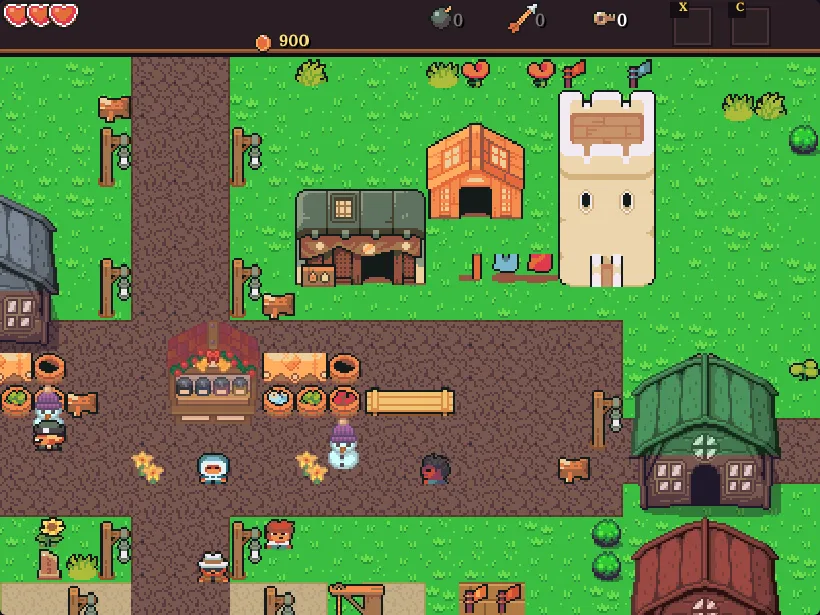
From 1 December a Winter Market opens in Saltmere with hot cocoa, gingerbread and snow globes. Eleven new fish and curiosities join the fishing log, and Oakham Farm now grows potatoes and tomatoes, with hens that lay daily.

The Winter Market stall with a snowman in Saltmere
The Winter Market, December only
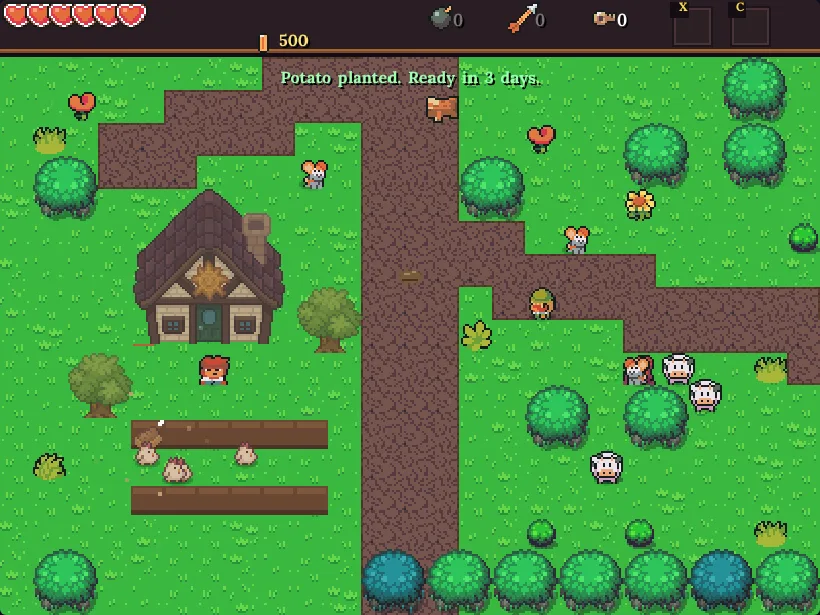
Oakham Farm with a farmhouse, crop plots and hens
Oakham Farm: plant, harvest, collect eggs
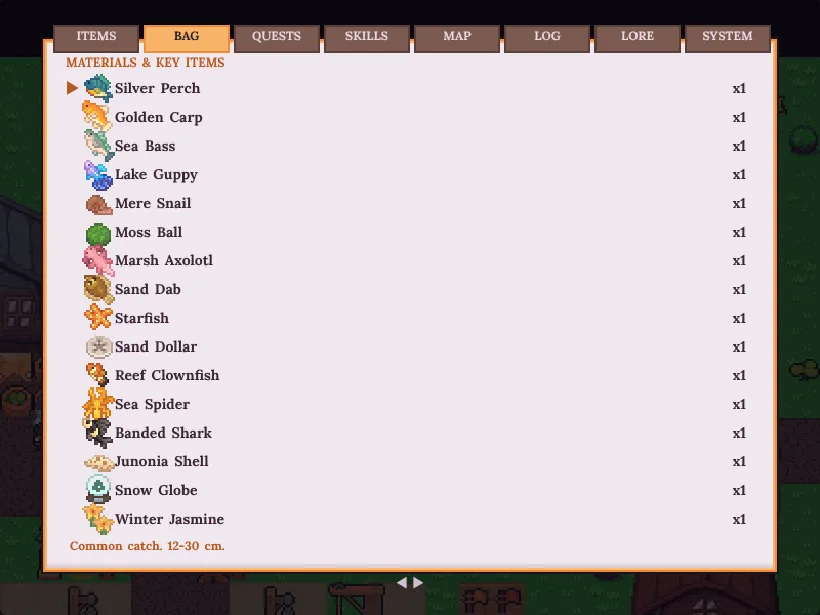
New fish and shell icons in the bag
New catches: axolotl, clownfish, banded shark and more

A tour of Saltmere

Step inside every building on the quay. Each one has its own people, stock and secrets.

Crabtree’s Catch: fish market
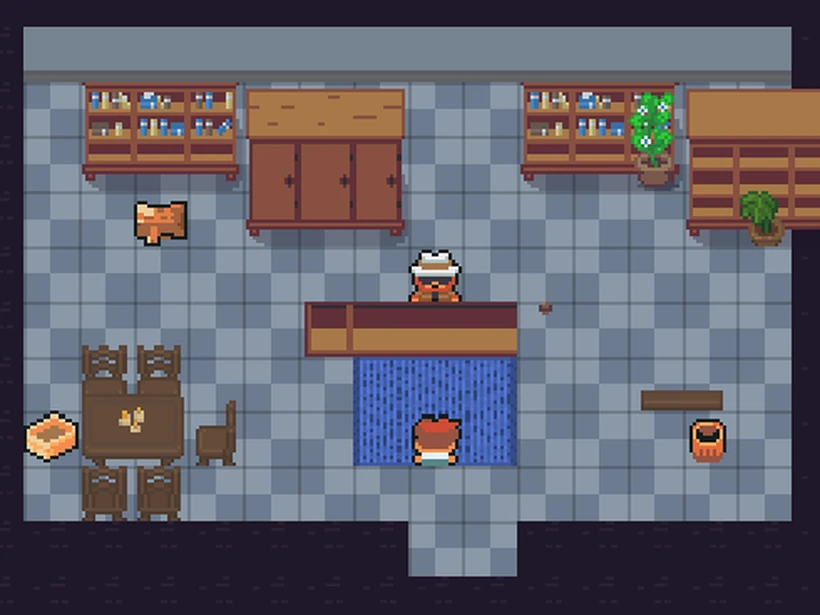
The Harbourmaster’s Office
Dockside Warehouse (mind the rats)
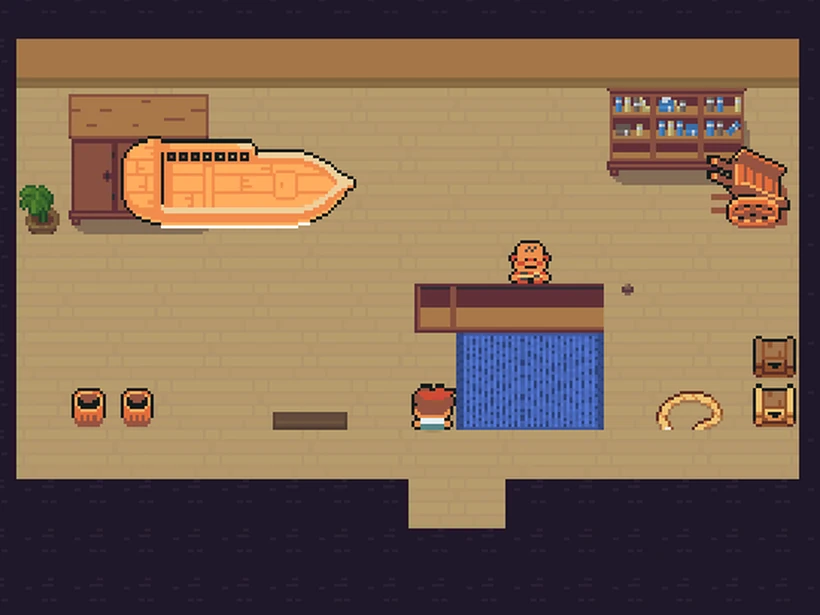
Finch & Daughter Boatworks
The Harbour Light and the quay
Dusk falls and the lamps come on

No two rooms alike

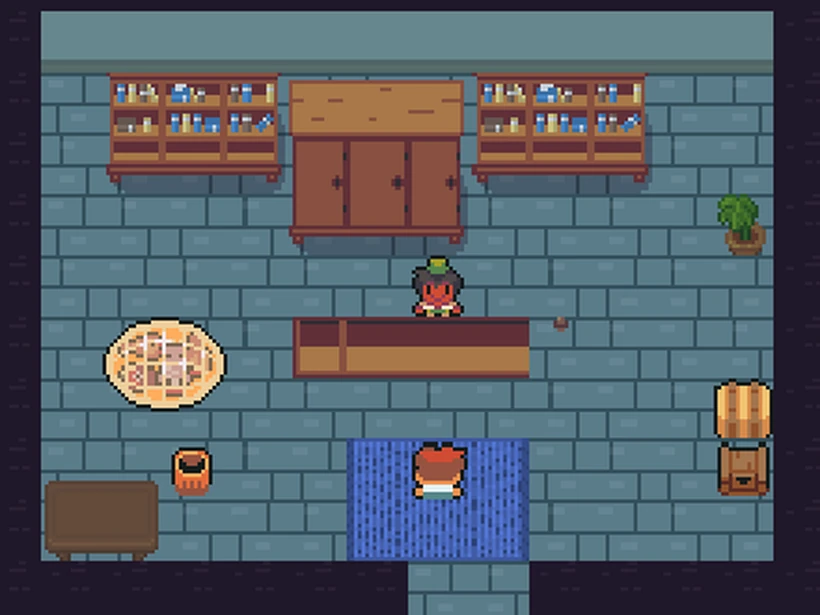
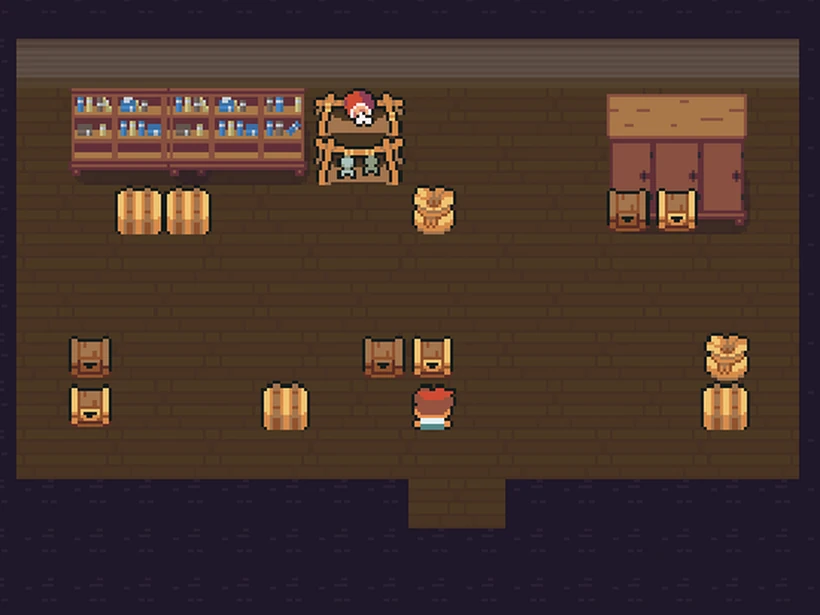
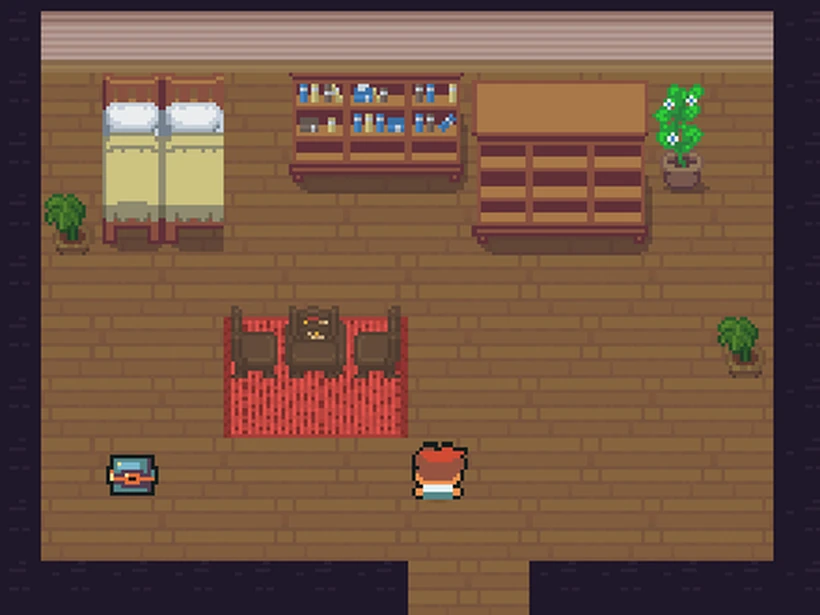
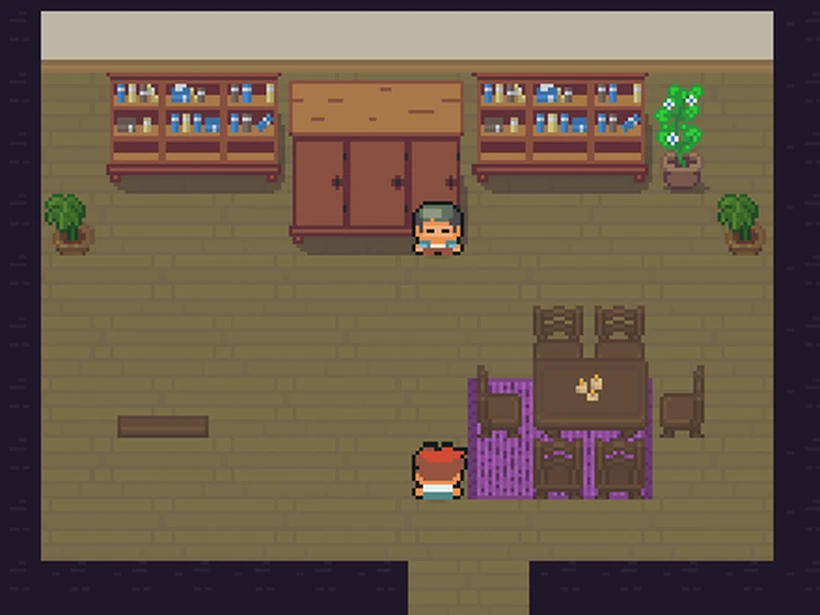
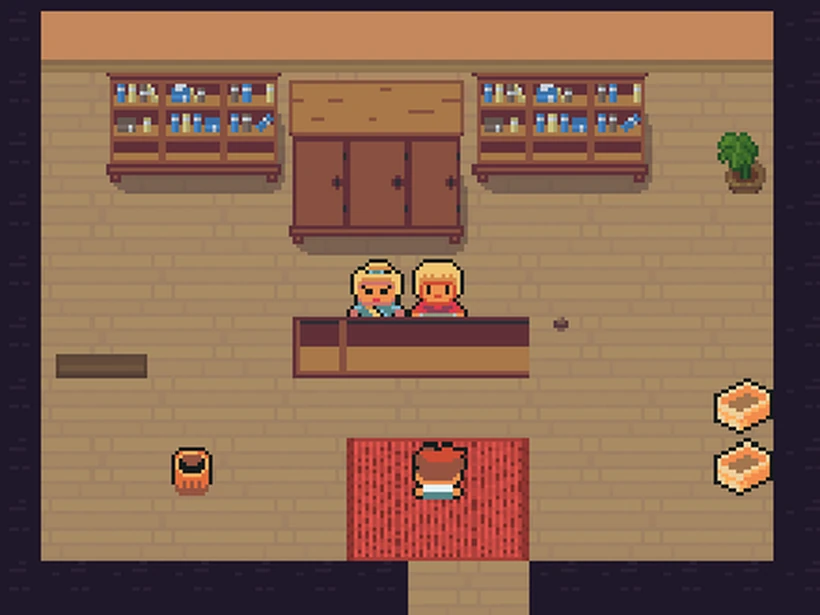
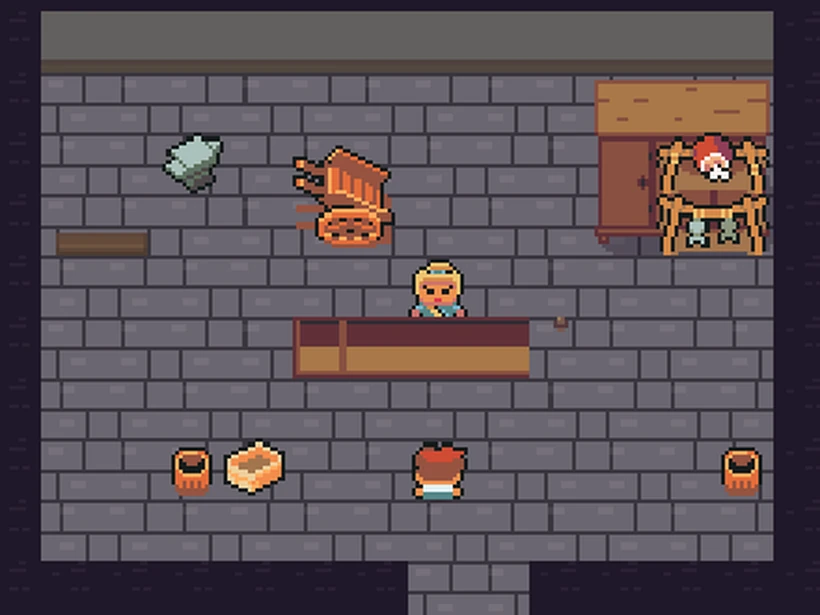
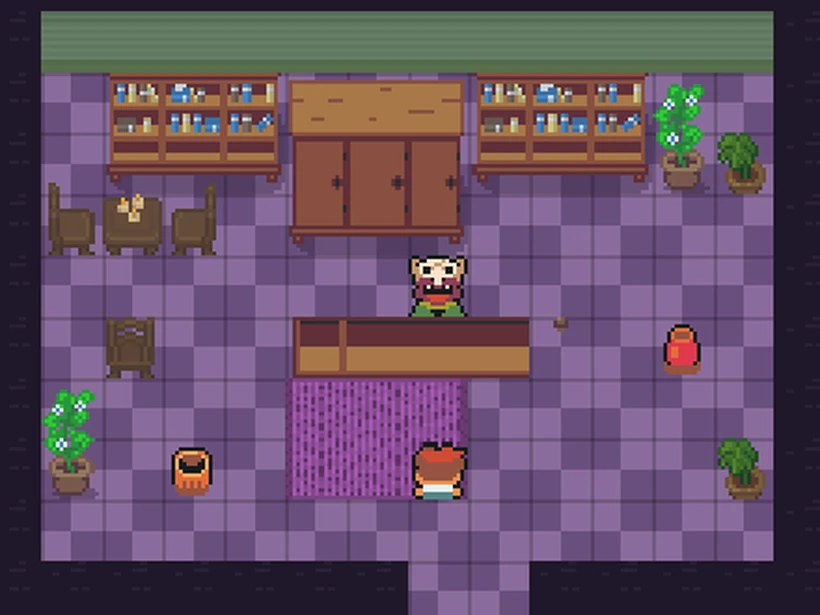
Every house and shop has its own floors, wallpaper, rugs and furniture, so you always know where you are.

Your house: warm wood and a red rug
Elder Wynn’s study
Elder Wynn’s study
Kori’s general store
Brenn’s forge: stone floors
Ilma’s apothecary
Ilma’s apothecary
The Drowned Lantern tavern

Meet the harbour

Talk to everyone. Almost all of them have a problem, a rumour or a quest.

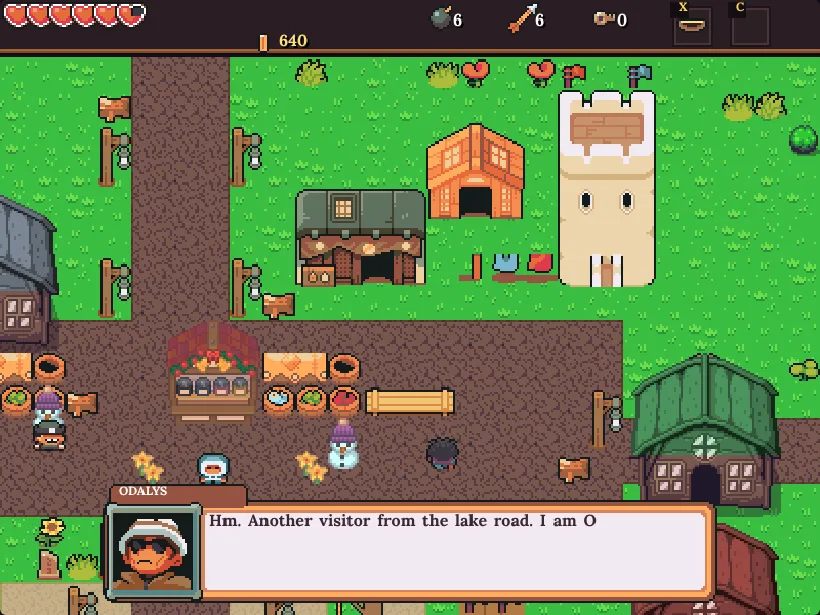
Odalys wants the lighthouse lit again
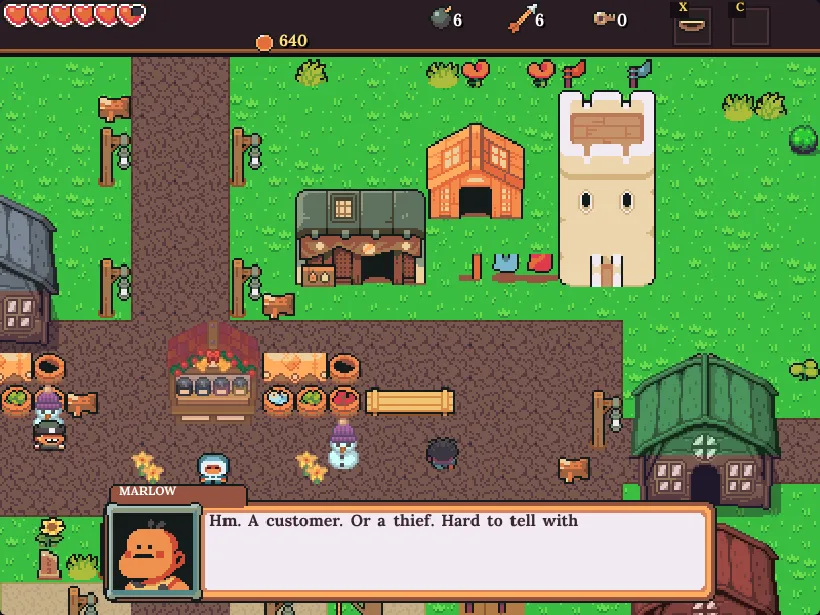
Marlow runs the market stall
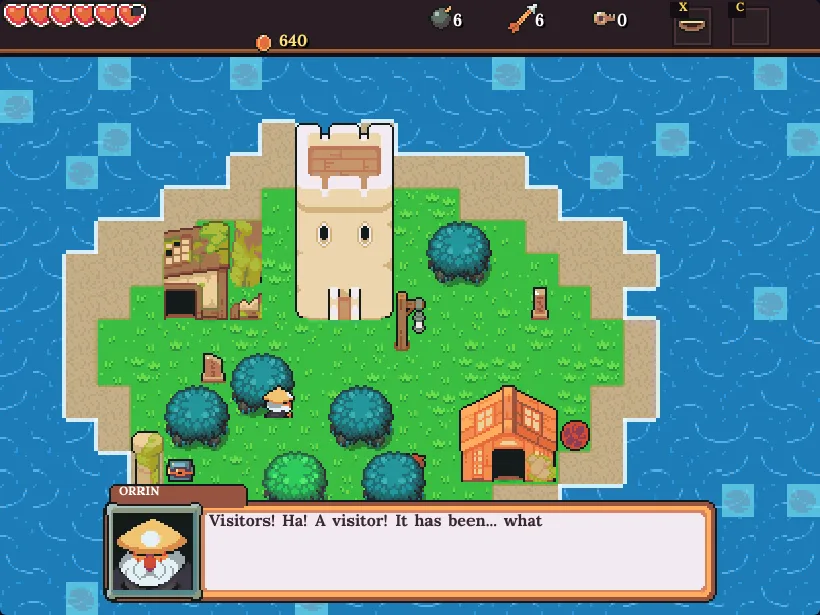
Orrin and the last lantern
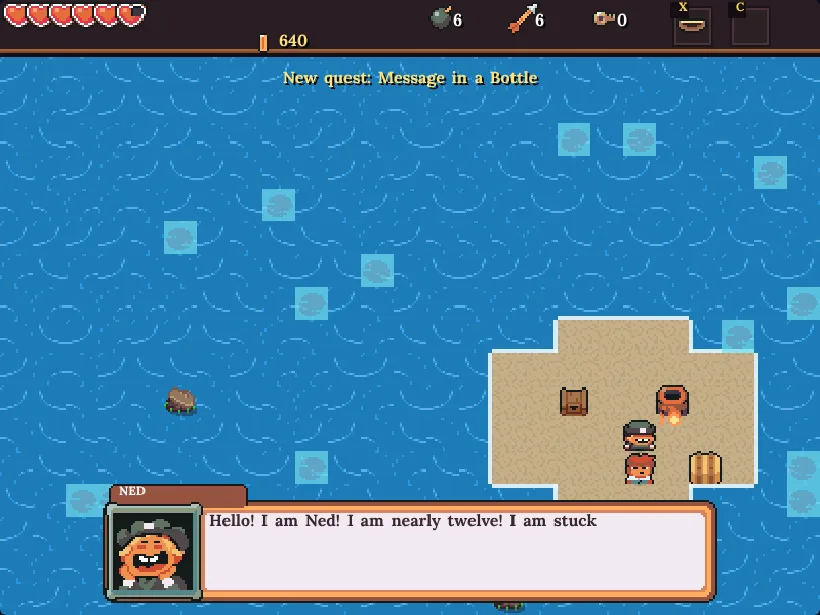
Ned, stranded on a sandbar
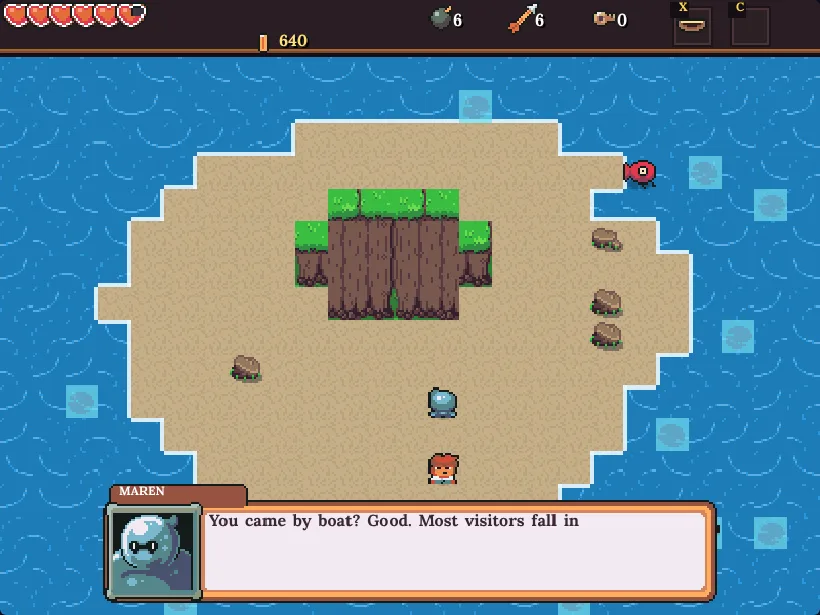
Maren and the song for the whales
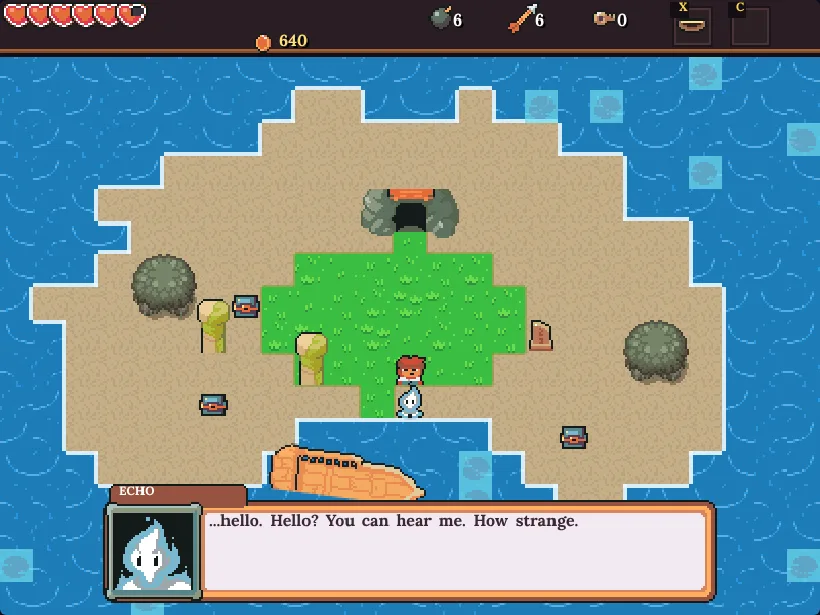
Echo, a ghost on Bonewreck Cove

Build a boat, sail the sea

Buy upgrades at the boatworks, then take the helm. The open water is full of buoys, wrecks, whales and trouble.

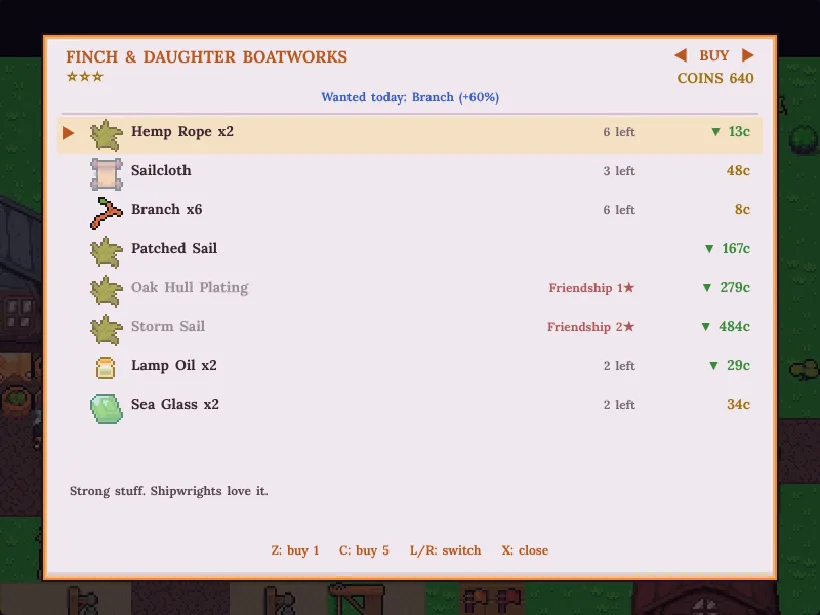
Boat upgrades and shipwright stock
Under sail on the Sundering Sea
Gulpers attack: fire your bow from the deck
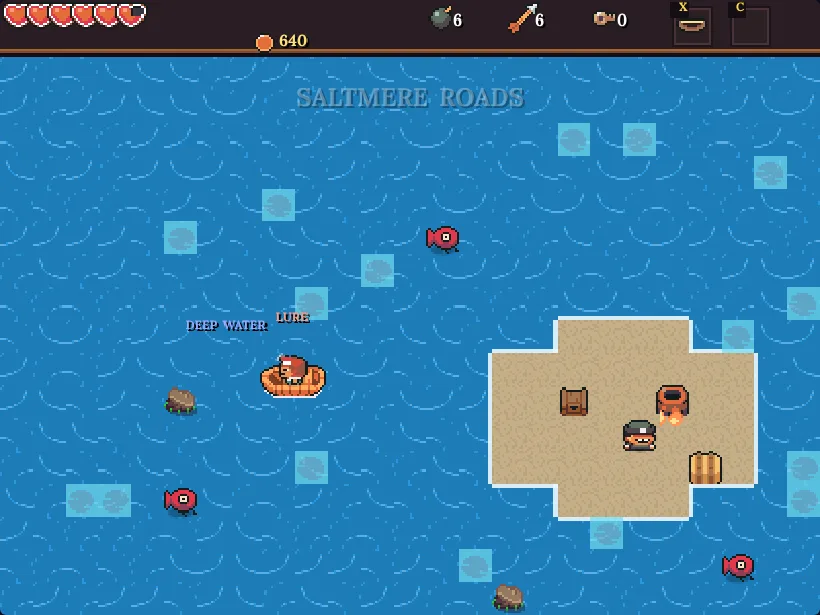
Cast a line from the boat
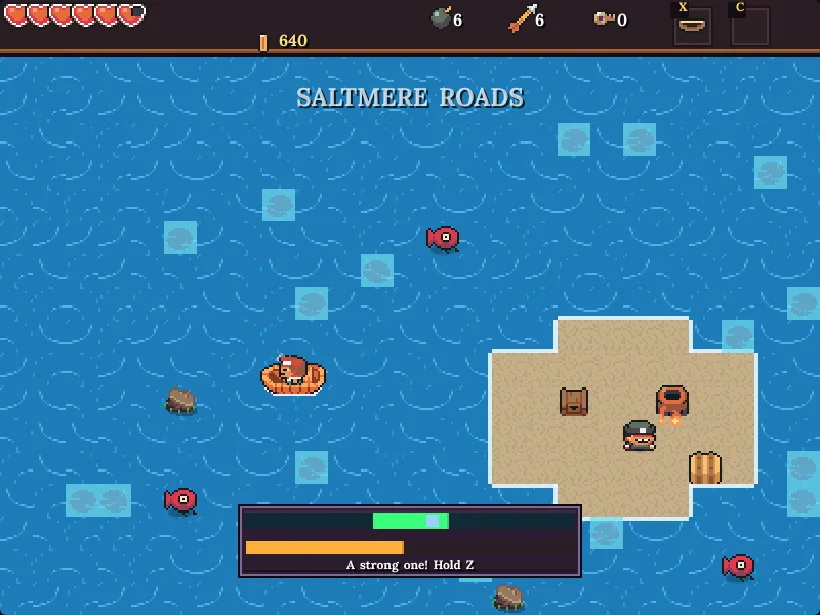
Hook something big and fight it
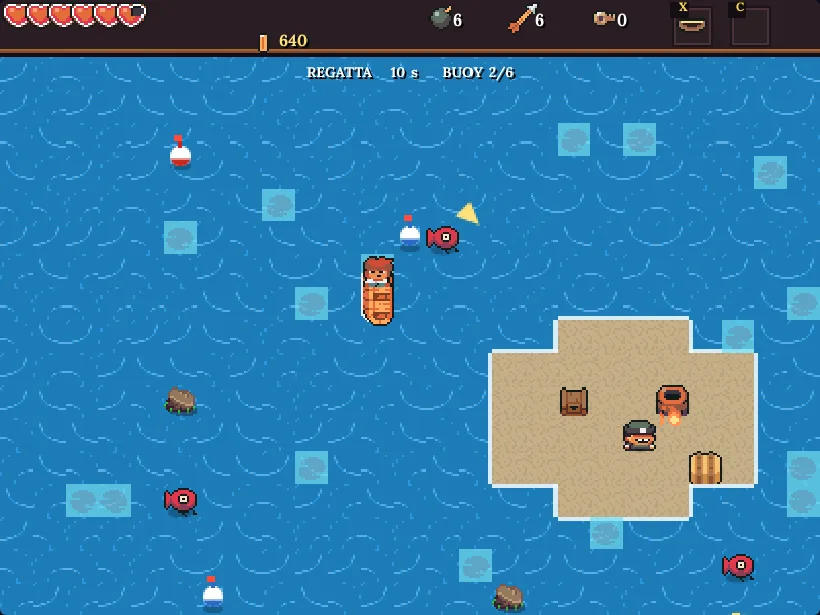
Race the buoy regatta against the clock

Every island has a story

Seven named islands and a scatter of islets, each with its own landmark and quest.

Coral Cay: palms, pearls and a grotto
Whale Rock: a song for the whales
Mistral Isle: windswept ruins
Bonewreck Cove: wrecks and a ghost
The Sunken Shrine
The Sunken Shrine
The east quay and the road home
Journal

Quests, lore and a sea chart that fills in

Your quest log tracks every thread. Lore tablets unlock chronicle entries about the Sundering, and the sea chart fills in as you explore.

  • Fifteen harbour and sea quests
  • A full chronicle of the Sundering Sea
  • A chart that shows every island you have found
The quest log in progress

The chronicle and the chart

The Chronicle of the Sundering Sea
The sea chart, island by island

Cook, craft, grow

New recipes, a bench and a cooking fire, a farm stand and a bag full of forage.

Cooking fire: chowder, baked potato, omelette
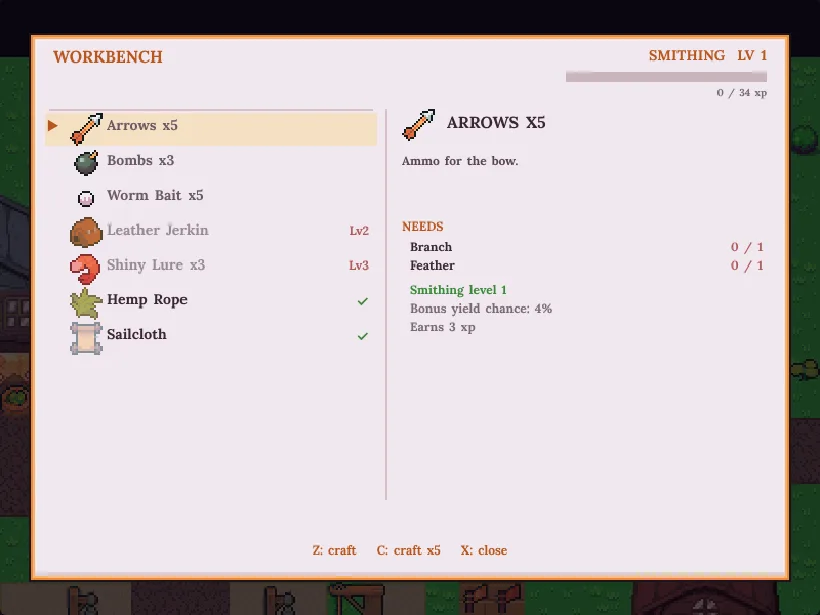
Workbench: arrows, rope, bait
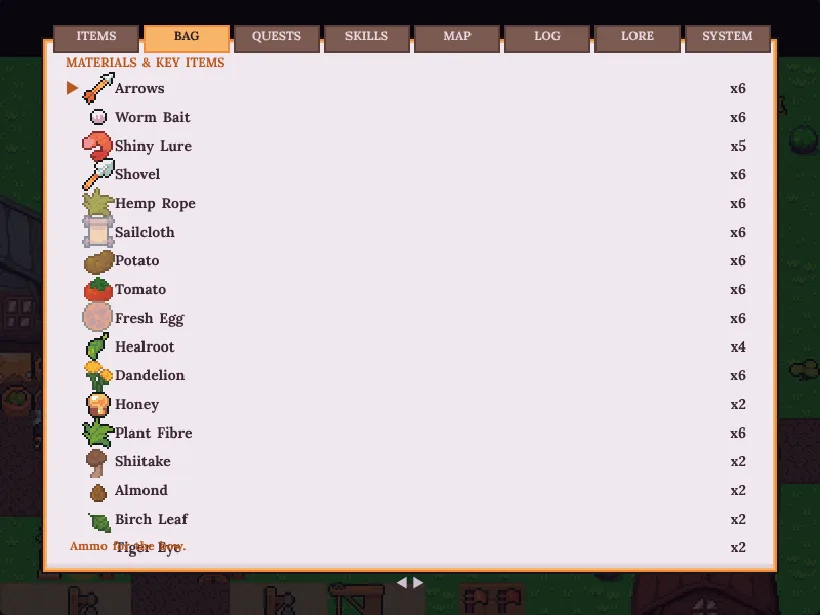
Bag packed with crops and forage
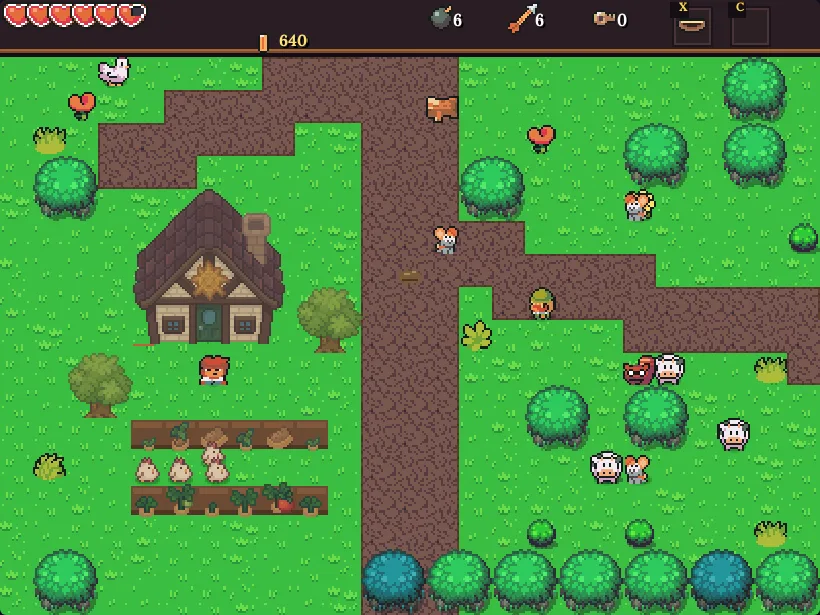
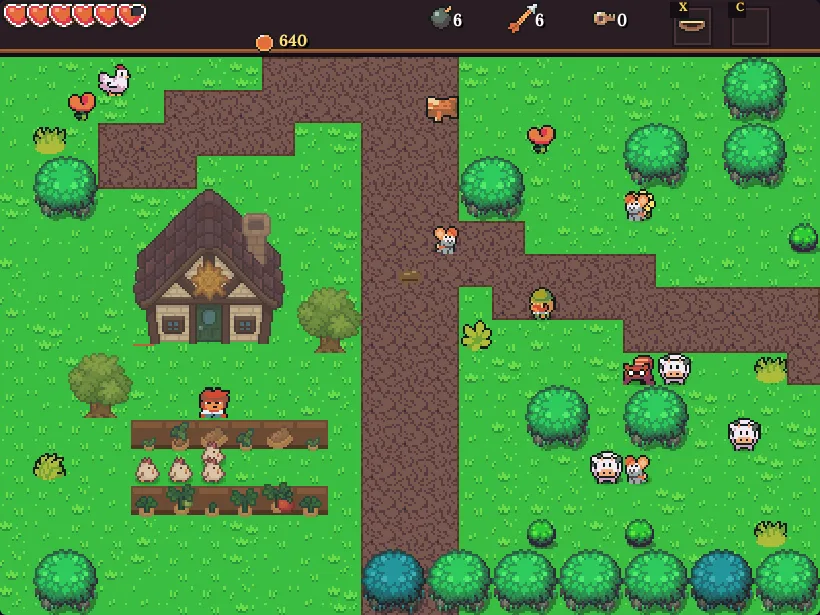
Oakham Farm in the evening
Plots, hens and a farmhouse
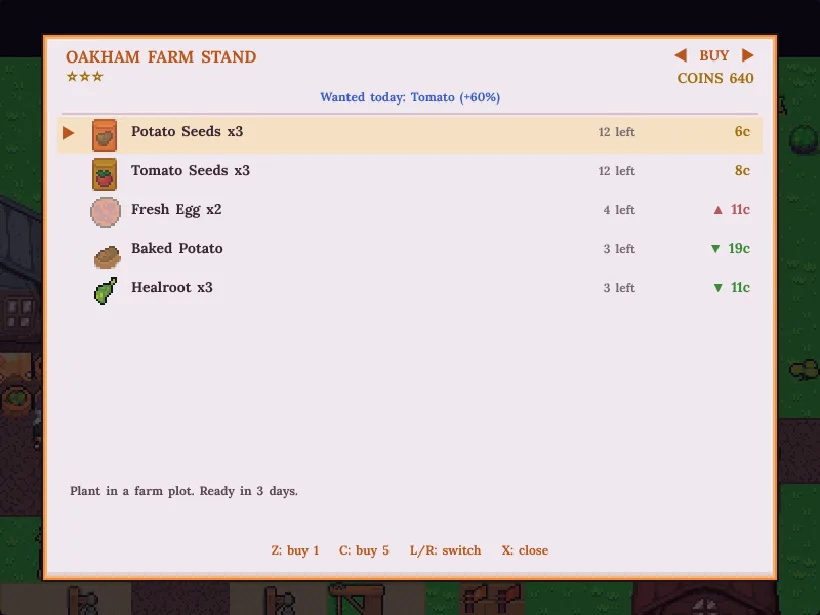
The farm stand: seeds and produce

Shops that notice

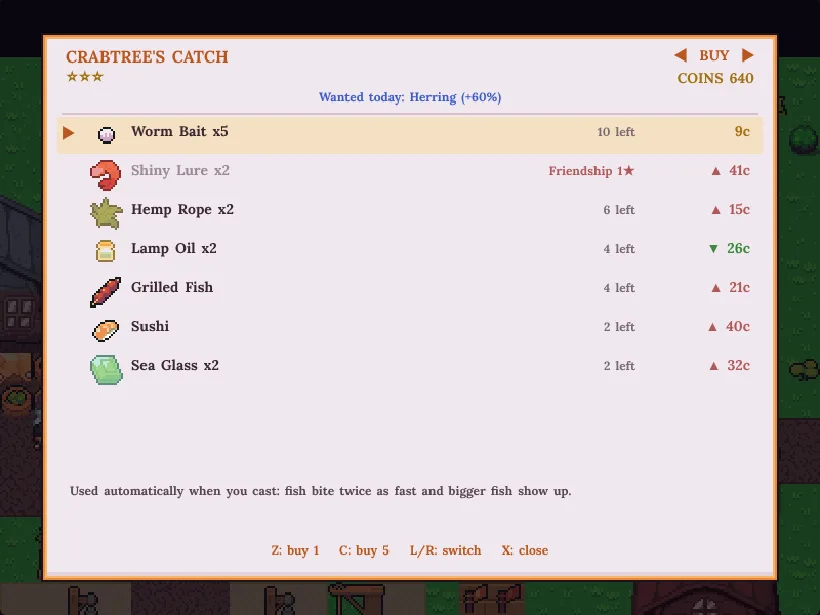
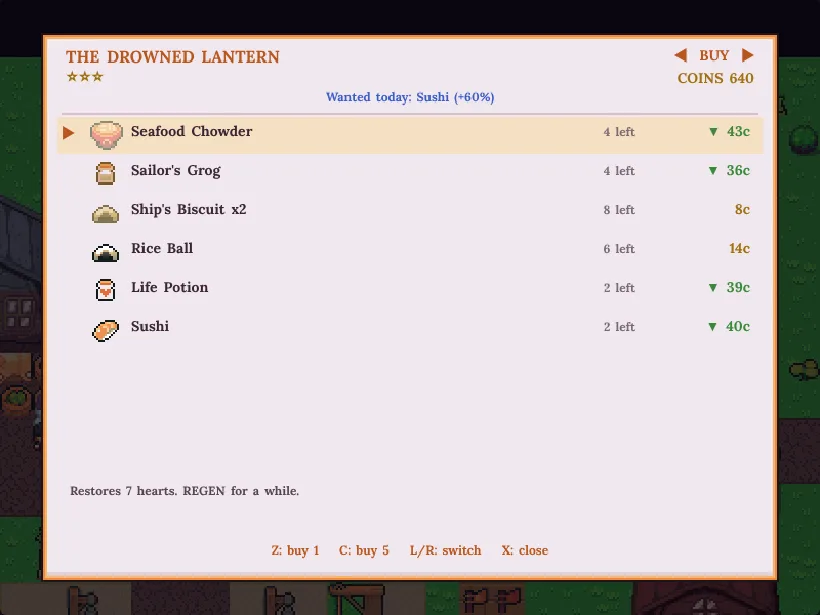
Every stall has its own prices, daily “wanted” items and friendship perks.

Crabtree’s Catch: bait, lures, sea glass
The Drowned Lantern: hot meals
Finch & Daughter: sails and rope
Play anywhere

Keyboard, touch-free, or gamepad

Plug in a controller and it just works: move with the stick or D-pad, swing the sword, swap items and open menus without touching the keyboard.

  • Standard-mapping gamepads in Chrome, Edge and Firefox
  • Keyboard still works side by side
  • Saves automatically in your browser
YXBAMove / D-padSword · Item · Talk · UseStart opens the menu · Shoulders switch tabs and shops

Everything in the box

All of it runs from a single WordPress shortcode.

Explore

Screen-by-screen overworld, caves, a crypt, a harbour town and a sea to sail.

Fight

Sword, spin attack, bombs, bow, wand, boss battle.

Gather

Forage, mine ore, fish, hunt, cut grass for fibre and surprises.

Craft

Bench, forge, cooking fire and alchemy cauldron.

Trade

Drifting prices, barter, friendship, daily contracts.

Discover

20 hidden secrets, Pieces of Heart, hints from locals.

Persist

Saves automatically in your browser and picks up where you left off.

Your pace

Choose Easy, Normal or Hard, then save, load, quit or restart from the menu.

Hear

27 music tracks and a full set of sound effects.

Pick up the sword. Dawn is waiting.

Play in your browser: arrow keys or a gamepad to move, Z or A to act, X and C for tools.

Dawnshard Vale

This is an indie game by Carl Ratcliffe (Purple Pixel Labs) and a homage to the Gameboy Advanced 2D Role Playing Games of the early 2000’s.

Pixel art from the Ninja Adventure pack (CC0, Pixel-Boy), ArMM1998's tiles and shubibubi's Cozy Fishing and Winter packs (free versions, non-commercial use). Typeset in Lora. Screenshots are from the live game.
Dawnshard Vale · Player’s Manual
The player’s manual

Dawnshard Vale
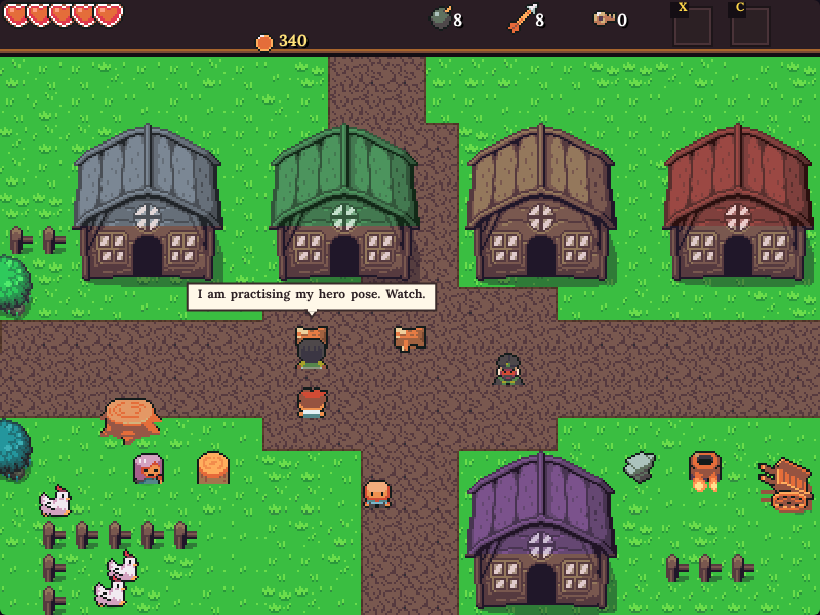
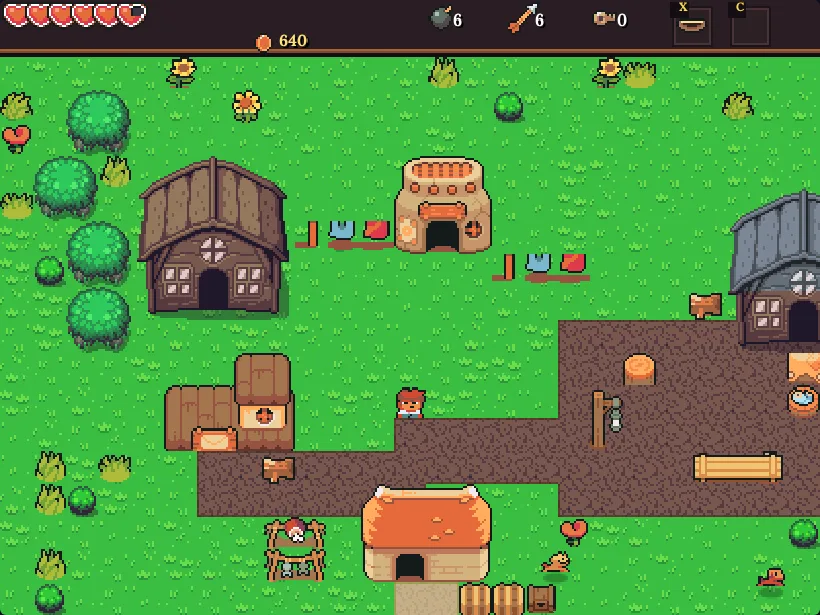
The village of Oakham on a sunny morning
An indie game by Carl Ratcliffe (Purple Pixel Labs), and a homage to the Game Boy Advance 2D role-playing games of the early 2000s.
Welcome, traveller

Before you begin

Dawnshard Vale is a top-down adventure in the spirit of the classics. You explore a vale screen by screen, fight with sword, bow and magic, and then keep going: cook, forge, brew, fish, farm, hunt, trade, and finally sail out from Saltmere Harbour to a sea of islands.

This manual explains how things work, in depth. The story chapters near the back contain light spoilers, so skip them if you would rather find the tale for yourself.

Contents

Saving: the game saves automatically in your browser. You can also save by hand from the SYSTEM tab.
Getting started

Controls

ActionKeyboard
Move←↑↓→ or WASD
Sword, talk, readZ or Space
Spin attackHold Z, then release
Tool slotsX and C
MenuEnter
Change spellQ (in the menu)
Sound on / offN

The tool slots hold whatever you assign to them from the ITEMS tab: the bow, bombs, the fishing rod, the wand and more. Switch what is in them as often as you like.

Interacting

Face something and press Z. That is how you talk to people, read signs and stone tablets, open chests, use the bench, forge, cooking fire and cauldron, plant and harvest crops, greet the hens and board your boat. Beds put you to sleep, and a new day begins.

  • The ITEMS tab sets what X and C do.
  • Walking onto a doorway or an edge moves you to the next room or screen.
  • Doors, stairs and cave mouths lead to other maps.
Click first. The game listens to the keyboard once it has focus, so click the screen before you start.
Play your way

Gamepad support

Plug in a standard controller and press any button. The game finds it automatically, in Chrome, Edge and Firefox, and the keyboard keeps working alongside it.

YXBALB: previous spellRB: next spellMove: stick or D-padA: sword, talk, readX / B and Y: tool slotsStartmenu
ASword, talk, read, confirm
X or B, YThe two tool slots (the triggers work too)
StartOpen the menu
LB / RBChange spell
Your pack and your notes

The menu

The menu showing the equipment tab

Press Enter to open it. Use left and right to switch tabs.

ITEMSYour gear. Assign tools to the X and C slots here.
BAGMaterials, crops, food and key items.
QUESTSEverything you have taken on, with the next step.
SKILLSYour levels, and what each one unlocks.
MAPThe vale as you have discovered it.
LOGFish you have caught and creatures you have hunted.
LOREThe chronicle, filled in by tablets and stories.
SYSTEMSave, sound, help, back to the title.
Practice makes progress

Skills and levelling

The skills tab
Skills tab

Six skills grow as you use them: Foraging, Mining, Fishing, Cooking, Smithing and Alchemy. Each goes up to level 10, and the SKILLS tab shows your progress bars.

The XP for a level rises steadily: 20 + 14 × your current level. Level 1 to 2 needs 34 XP, level 5 to 6 needs 90, and level 9 to 10 needs 146.

SkillYou gain XP byWhat levels do
ForagingCutting grass, harvesting cropsMore herbs and mushrooms from grass. Honey starts dropping at level 4.
MiningBreaking rocks and ore veinsA better chance of extra ore from every rock.
FishingLanding fish (rare ones give more)Shorter waits, a wider green zone, bigger fish, and new species at levels 2, 3, 4 and 6.
CookingCooking at a fireNew recipes, plus a bonus-yield chance.
SmithingUsing the bench and forgeBetter gear unlocks at higher levels.
AlchemyBrewing at the cauldronNew potions, plus a bonus-yield chance.
Bonus yield: once your skill passes a recipe’s level, every craft has a chance to make extra, 4% for each level above it, up to 40%. Armour and weapons never roll a bonus.
Staying alive

Combat

Fighting enemies with the sword in the overworld

Swing the sword with Z. Hold it down to charge, then let go for a spin attack that hits everything around you.

  • Bow: fires arrows in the direction you face. Arrows are limited, so craft more at the workbench.
  • Bombs: clear weak walls and groups of enemies. Keep your distance.
  • Wand and spells: spend magic. Press Q in the menu to pick one.
  • Hearts: when you are hit, you flash and cannot be hit again for a moment. Use it to get clear.
Recover: eat food, drink a Life Potion, or sleep in a bed. Cooked meals heal more than raw ingredients.
Into the dark

Dungeons and bosses

Inside the Whisper Crypt
The Whisper Crypt
Boss battle with the Giant Slime
A boss fight

Dungeons are dark. Keep an eye out for torches, bring a full set of hearts and read the room before you rush in. Keys open locked doors.

Every boss has a pattern. Spend the first moments dodging and watching, find the opening, then strike.

Out at sea

Two more bosses wait beyond the harbour: a ghost captain and something very large in the deep. Both reward patience.

Exploring

The Vale

The world is a patchwork of screens. Walk off an edge and the view slides to the next one. Each region has its own look, creatures and things to gather.

The Whisper Woods
Whisper Woods
A lake in the vale
Lakeshore
Whisper WoodsSouthern MarshSouth PlainsDawn MeadowFork RoadOakham FarmStonepeak FoothillsStonepeak PassHighland RuinsNorthern Cliffs

A name flashes on screen as you enter a new region. Check the MAP tab to see where you have been and what is left to find.

Look closely. Cracked walls, odd stones and out-of-place bushes often hide something. There are twenty hidden secrets to find, and Pieces of Heart for the thorough.
A living world

Day, night and weather

The village by day
Day
The village at night with lit windows
Night
Rain falling on the village

Time passes as you play. Some days it rains, and storms bring thunder. At night windows glow, torches burn and fireflies drift over the grass.

  • Villagers keep routines. Shops close, people go home and sleep.
  • Some creatures only come out at night, and some fish only bite in the rain.
  • Sleep in a bed to pass the night. Crops grow while you rest.
Talk to everyone

People and quests

A villager speaking in a dialogue box

Stand in front of someone and press Z to talk. Many people have a problem, a rumour or a job for you. When you take one on, it appears in the QUESTS tab with the next step spelled out.

  • Some people only talk at certain times, or after certain events.
  • Come back after you have done something big. They notice.
  • Locals drop hints about secrets, if you listen.
  • Press Z on a quest-giver again to hear the next step. The QUESTS tab keeps the details.
For the thorough

Secrets and Pieces of Heart

A suspicious spot
A suspicious spot
A secret found
Secret found!

Twenty secrets are hidden around the vale and beyond. Cracked walls, odd stones, out-of-place bushes and patches of bare ground are all worth a bomb, a shovel or a long look. When you find one, the game tells you.

Pieces of Heart

Collect four Pieces of Heart and they combine into a new heart container. You can earn them in three ways:

  • Exploring. Some secrets reward you with a piece.
  • Bartering with Zeph. The wandering peddler will trade a Piece of Heart for one each of a Ruby, an Emerald, an Amethyst and a Topaz.
  • Completing a log. Catch every freshwater species and Tomo hands one over.
Heart Containers are the bigger prize, and they raise your maximum health straight away.
Take only what you need

Gathering

A suspicious spot to dig
Dig here?
The bag full of materials
A well-stocked bag
  • Forage: herbs, mushrooms, flowers and nuts grow in the wild. Each region has its own.
  • Mine: rocks and ore veins give stone and ore. You will need a pickaxe.
  • Cut grass for fibre, and the occasional surprise.
  • Dig: with a shovel, suspicious spots give up buried things.

Every skill levels up with use (Foraging, Mining, Fishing, Cooking, Smithing, Alchemy) and the SKILLS tab shows your progress.

Make it yourself

Crafting

The cooking fire menu
Cooking fire
The workbench menu
Workbench
WorkbenchArrows (x5), bombs (x3), bait, rope, and the first armour.
ForgeSmelts ore and wood into bars (iron, then copper, silver, steel with coal) and forges swords and heavy armour.
Cooking fireTurns ingredients into meals, from rice balls to steaks, stews and pies.
Alchemy cauldronBrews potions, elixirs and teas.

Stand at a station and press Z. Recipes list their ingredients and the skill level they need. Each craft earns skill XP, and once you out-level a recipe it can pay out bonus items.

Gear tiers

TierSwordArmour
1Hero’s SwordTravel Tunic
2Iron EdgeLeather Jerkin (Smithing 2, 12% less damage)
3Steel BladeIron Mail (Smithing 3, 22% less)
4Dawnsteel BladeSteel Plate (Smithing 6, 32% less)

Armour upgrades cost bars, leather and some coins (20, 80 and 200). Some recipes only appear after you buy their scroll from Ilma or Zeph.

Eat well

Healing, food and buffs

Raw ingredients heal little. Cooked meals and brewed potions heal a lot and many of them add a buff, a timed bonus shown on the SKILLS screen. Only one buff is active at a time, and eating another replaces it.

ItemHealsBuff
Rice Ball2 hearts-
Life Potion3 hearts-
Grilled Fish4 hearts-
Sushi6 hearts-
Herb Stew4 heartsRegen: slowly heals for a minute
Frog Skewer3 heartsRegen
Fish Pie3 heartsGuard: take 25% less damage
Hearty Steak5 heartsPower: the sword hits harder
Boar Roast6 heartsPower, for longer
Angler’s Platter5 heartsAngler’s Luck: bites come faster, rare fish are likelier, and the green zone is wider
Calm Teasome manaFocus: mana returns faster
Mana Elixirall mana-
Greater Life Potionall hearts-
Armour works all the time: a Leather Jerkin takes off 12% of every hit, Iron Mail 22% and Steel Plate 32%. Guard stacks with it.
Respect the wild

Hunting

A wild boar
Boar
A pack of hyenas at dusk
Dusk hyenas

Wild animals roam the regions. Learn their habits before you fight.

  • Boars charge in a straight line. Sidestep, then strike.
  • Hyenas hunt at night and in packs. Fight with your back to a wall.
  • Raccoon bandits steal. Chase them down to get it back.
  • Mountain lions are rare, and nobody forgets meeting one.

Hunting drops meat, leather, fur, fangs and more, all useful at the cooking fire, forge and shops. The LOG tab keeps a record.

Slow and steady

Oakham Farm

Crop plots, trees and hens at Oakham Farm
The farmhouse and fences
The farm stand's stock
  • Buy potato and tomato seeds from Joss at the farm stand.
  • Talk to bare soil to plant. The crop tells you how many days it needs.
  • Sleep in a bed to pass time. Return to harvest. You sometimes get a seed back.
  • The hens lay one egg each, per day. Say hello once a day.

Potatoes, tomatoes and eggs go into hearty recipes at the cooking fire.

Trading, part one

The merchants

A shop screen
A shop at the counter
The forge
Brenn’s Forge

Five traders cover the vale. Each has a regular stock that refreshes every morning, a few rotating specials, one thing they badly want today, and a short list of gifts they love.

TraderSellsBuys well
Kori
General Store
Bombs, arrows, rice balls, bait, potions, honey, leatherFeathers, wood, fibre, stone, honey, seeds, herbs
Brenn
The Forge
Pickaxe, shuriken, coal, iron bars, leather, rotating ore and barsOre, coal, bars (85%) and gems (80%)
Ilma
Apothecary
Herbs, vials, potions, elixirs, mushrooms, recipe scrollsHerbs (90%), potions (85%), gems
Tomo
Tomo’s Catch
Bait, grilled fish, rod upgrades, the Fish Pie recipeFish (95%) and cooked food (75%)
Zeph
The Peddler
Gems, silver, scrolls, rare recipes, barter dealsGems and silver, at the best rates of all

Zeph only comes through every third day, and only while the sun is up. If he is in the square, buy while you can.

Trading, part two

How prices work

When you sell

Every item has a base value. A shop pays a share of it, which depends on the shop and the kind of item (Tomo pays 95% for fish and 35% for most other things).

  • Wanted today: each trader names one item they will pay 60% extra for. It changes daily. Look for it in the greeting and at the top of the shop screen.
  • Demand: every time you sell the same item to the same shop, its price falls by about 4.5%. The fifth identical sale pays roughly 18% less than the first. The floor is half price.
  • Recovery: demand recovers by two sales a day, so spread your stock across several shops and several days.
  • Friendship: each star adds 3% to what they pay.

When you buy

  • Daily drift: each item’s price wanders up to 8% either way from day to day. A red arrow is dear, a green arrow is cheap.
  • Friendship: each star takes 3% off.
  • Limited stock: most items have a daily limit and show how many are left. Rotating specials swap in and out each day.
  • One-offs: tools, recipes, scrolls and upgrades sell once only.
  • Locked rows: some goods need a friendship level first and are greyed out until you earn it.
Shop controls: Z buy one, C buy five, left and right switch buy or sell, X close.
Trading, part three

Friendship and bartering

Every trader remembers you. Friendship runs from zero to three stars, and each star is worth better prices, more stock and warmer greetings.

You do thisThey like you more
Choose Chat (once a day)+2
Give a favourite gift (once a day)+12
Spend coins in their shop1 point per 30 coins
Sell them goods1 point per 25 coins earned
Finish a guild contract set for them+6

The stars come at 40, 120 and 260 points. If you do not know what someone likes, choose Give a gift and they will tell you.

Bartering with Zeph

Some of the peddler’s goods cost no coins at all. They are priced in items instead.

  • A Piece of Heart for one Ruby, one Emerald, one Amethyst and one Topaz.
  • Mana Elixirs (x3) for two Amethysts.
  • Coal (x6) for five feathers.
Scrolls teach. Recipe and spell scrolls in the shops are one-time buys, and they unlock things you cannot craft any other way.
Trading, part four

Guild contracts

The contract board
The guild board

The notice board in Oakham posts five new contracts every day. Take up to three at a time. Each one lasts three days, and expired jobs simply vanish.

  • Fetch: hand in a number of items.
  • Hunt: defeat a number of one kind of creature.
  • Craft: make a number of something.
  • Fish: catch fish, or from Bronze rank a particular species.
  • Mine: break ore rocks.

Each reward pays coins, guild XP and +6 friendship with a named trader. From Gold rank some also carry a bonus gem.

RankGuild XPReward bonus
Novice0base pay
Bronze60+18%, harder jobs
Silver160+36%, rarer targets
Gold340+54%, bonus gems
Legend640+72%
Fishing, part one

Casting and waiting

Casting a line into the lake
The cast
Fishing from the boat
From the boat
  1. Put the Fishing Rod in a tool slot (ITEMS tab), and face the water.
  2. Use the tool. The line reaches up to five tiles of open water, or six with the Master Rod. No water in range gives a NO WATER warning.
  3. Wait. When the float dips, a fish is investigating.
  4. When the float plunges, press Z straight away. You only have about three quarters of a second before it gets away.

What shortens the wait

Fishing level4% shorter per level (36% at level 10)
Rain20% shorter
Worm BaitHalves the wait, and uncommon fish are likelier
Shiny LureWait cut to 40%. Rare fish are three times likelier and junk never bites
Hot spotBubbling water on the lake. Wait cut by about half, and rare fish twice as likely
Master Rod20% shorter, longer cast, longer bite window

Bait and lures are used up by the cast. To stow the rod before a bite, press X or C.

Fishing, part two

Reeling in

Reeling in a legendary fish
A legendary fight

A bar appears at the bottom of the screen. A green zone is the part you control. A coloured marker is the fish.

green zone: hold Z to move it rightcatch meter: fills while the fish is inside the zone
  • Hold Z and the zone slides right. Release and it drifts back left.
  • Keep the marker inside the zone. Inside, the catch meter fills. Outside, it drains.
  • The meter starts at 35%. Fill it to 100% and the fish is yours. Let it hit zero and the fish escapes.
  • Fish tire as the meter fills, so the last stretch is easier.
  • Thunder Eels leap from side to side. Anticipate them.
Wider zone: every Fishing level adds a little width, the Strong Line adds much more, and the Fast Reel makes the zone follow your hand faster.
Fishing, part three

Fish guide

FishWhere and whenSize cmNeeds
MinnowAnywhere fresh5–12
Silver PerchLakes, woods. Likelier by day12–30
River CarpLakes, woods, marsh20–48
Mud CrabSouthern Marsh mostly8–18
Mere SquidLake Mere15–40
Rainbow TroutMountain streams. Twice as likely in rain25–55
Whisker CatfishLakes, woods, marsh. Night40–90Level 2
Rock OctopusLake Mere30–70
Lake PikeLakes, mountains. Dawn and dusk50–110Level 3
Ruby KoiLakes and woods. Fair weather, not at night40–80Level 3
Thunder EelLakes, marsh. Storms only70–130Level 3
MoonfinDeep night, dry weather30–60Level 4
Golden CarpLakes. Likelier at night55–95Level 3
King SturgeonLakes, mountains120–210Level 6 and a Strong Line

Where the table says “lake”, it means Lake Mere and its shore. “Mountains” covers Stonepeak, the Highlands and the Northern Cliffs. Everywhere else counts as woods.

The fish log
Your log
New fish icons in the bag
Newer catches
Fishing, part four

Records, trophies and tackle

Rarity

Fish are graded by colour: common, uncommon, rare and legendary. Rare and legendary fish fight harder and pay far more.

Records and trophies

  • Each species remembers how many you have caught and your biggest. Beat it and you will see New record!
  • A fish in the top 12% of its size range is a TROPHY SIZE catch: a coin bonus of about 160% of its value, and extra Fishing XP.
  • Higher Fishing levels, lures and hot spots all push sizes up.
  • Master Angler: land every freshwater species once and Tomo gives you a Piece of Heart. The harbour and sea fish keep their own pages and do not count.

Junk

Not every bite is a fish. Junk is usually just a branch, but about one in seven is a waterlogged purse of coins, and now and then there is an Emerald. Bait cuts the junk to a quarter. A lure stops it entirely.

Tackle at Tomo’s

Strong Line260 coinsA much wider green zone. Needed for the King Sturgeon.
Fast Reel340 coinsThe zone follows your hand faster.
Master Rod760 coinsLonger cast, quicker bites, forgiving fights. Needs the Strong Line.

The better upgrades unlock as your friendship with Tomo grows.

Chapter two

Saltmere Harbour

The Harbour Light on the quay

Follow the south-east road to a working port. There is plenty to do before you sail.

Inside the fish market
Fish market
The boatworks
Boatworks
  • Take jobs from the Harbourmaster and the Dockhand.
  • Eat and listen at the tavern, The Drowned Lantern.
  • Buy bait and lures at the fish market, and sailcloth and rope at the boatworks.
Take the helm

Sailing

Sailing the Sundering Sea
  • Board: talk to your boat at the quay once it is yours.
  • Steer with the arrows or the D-pad. Press Z next to land to go ashore.
  • Fish from the deck. Open water holds fish you will not find ashore.
  • Fight: sea creatures attack. Fire your bow from the boat.
  • Upgrade: the boatworks sells better hulls and sails.
Fighting sea creatures from the boat
Gulpers attack
The regatta with its timer
The regatta

Regatta: talk to the Dockhand, then sail the buoys in order against the clock. Bronze, silver or gold.

Out on the Sundering Sea

The islands

The sea chart

The sea chart in the MAP tab fills in as you explore. Seven named islands and a scatter of small ones wait out there.

Lantern IsleSandbarCoral CayWhale RockMistral IsleBonewreck CoveSunken Shrine
Coral Cay
Coral Cay
Bonewreck Cove
Bonewreck Cove
The story so far · light spoilers

The Legend of the Crown

Lantern Isle at dusk

Long ago a star fell into the Sundering Sea. The Tidewardens of Vael, a shining island-city, forged it into the Crown of Dawn. While the Crown burned, the Long Night stayed beyond the horizon.

The Tidewardens swore to keep the Lantern Line: seven lighthouses from the northern cliffs to the southern reef, each lit at dusk so that no ship would be lost to the dark.

But Prince Morwen of Vael wished to hold the dawn forever. He put on the Crown himself, and the light broke it. The Crown burst into three Shards, and what was left of the prince was hollow. The dark has worn his name ever since: the Hollow King.

Vael slid beneath the sea in a single night. Three hundred years have passed. The survivors rowed to the lake-mouth and built Saltmere, named for the salt on their faces, and kept the Lantern Line burning out of habit, then out of love.

Now: the sky over Oakham has gone strange and the crows nest in daylight. The Hollow King hunts his lost pieces, and Elder Wynn has put a sword in your hand.
The shards and the sigils

Shards, Sigils and a captain

The Whisper Crypt
The first Shard sleeps here
Bonewreck Cove
Where the captain’s story ends

Each Shard went somewhere different.

  • The Hearth Shard was carried to the crypt beneath Whisper Woods, and sealed away in the dark.
  • The Tide Shard was sealed inside the shrine of Vael by Captain Hester Vane, who was always careful.
  • The third belongs to the Hollow King himself.

Hester locked the shrine with three Sigils, keys shaped like waves, and scattered them. The Lantern Sigil is kept where the light once burned. The Coral Sigil is kept where the sea is kind. The Bone Sigil is kept where Hester sleeps. Then she sailed the Marigold into the dark to lead the Hollow away. She never came home, and her crew would not leave her.

The shrine rises from the sea only on the highest tides, and it opens only to someone who carries all three Sigils. A creature of the deep guards it. The old charts call it the Deep Keeper. It was a friend of the Wardens once. It does not remember.

The people of the vale and the sea

Who’s who

Orrin on Lantern Isle
Orrin
Maren the selkie
Maren
Elder WynnOakham’s elder. Hands you a sword and tells you what the sky is saying.
Kori, Brenn, Ilma, TomoThe vale’s merchants: general goods, forge, apothecary and fish.
ZephA peddler who passes through every third day with things nobody else has.
JossKeeps the stand at Oakham Farm.
OdalysSaltmere villager who wants the Harbour Light burning again.
MarlowKeeps a stall on the quay and a wary eye on customers.
OrrinKeeper of the last lantern on Lantern Isle.
NedA boy stranded on a sandbar, and hungry.
MarenA selkie on Whale Rock who has lost the old songs.
EchoA lingering voice at Bonewreck Cove.
Captain Hester VaneThe last Tidewarden captain. Her story lives on in the logs she left behind.
Fourteen entries

The Chronicle of the Sundering Sea

Reading a stone tablet
Tablets
The chronicle list
The chronicle

The LORE tab lists every entry. Undiscovered ones show as ??? with a hint about where to look. Stand in front of a tablet and press Z to read it, or listen to what people tell you.

EntryWhere to look
The Crown of DawnTold by Elder Wynn
The Hollow KingAsk the Harbourmaster
The Lantern LineA stone on the Saltmere quay
The Founding of SaltmereA plaque in the harbour square
The SunderingLantern Isle
The Last LanternLantern Isle
The Three SigilsAsk a scholar of the old charts
The Kind WaterCoral Cay
The Last VoyageBonewreck Cove
The SelkiesWhale Rock
The Star ChartsMistral Isle
The Sunken ShrineOut in the far south-east
The Deep KeeperThe Sunken Shrine
A Word from the HollowDeep in the shrine
Festive

Seasonal extras

The Winter Market in Saltmere

From 1 December, a Winter Market opens in the harbour square. Look for hot cocoa, gingerbread and snow globes, plus a few decorations around town.

New fish and shells

New fish and curiosities join the fishing log: axolotls, clownfish, banded sharks and more. Fill the page.

Gentle nudges

When you are stuck

  • Check the QUESTS tab. It always names the next step.
  • Talk again. Dialogue changes after you do something.
  • Look at the MAP. Empty spaces are things you have not found yet.
  • Read the LORE. It points to places and people.
  • Cook before you fight. A real meal beats a fresh heart.
  • Craft arrows and bombs before a long trip. Running out is the usual cause of trouble.
  • Sleep. Time moves crops, prices and routines along.
  • Try both ends of the day. Some things only appear at night.
  • Fish in the rain. Different weather, different catch.
  • Bring bait to the harbour.
Found a bug? If something truly will not work, tell Carl.
Thank you

Credits

Dawnshard Vale is an indie game by Carl Ratcliffe (Purple Pixel Labs), a homage to the Game Boy Advance 2D role-playing games of the early 2000s.

Purple Pixel Labs

Art

  • Ninja Adventure pack by Pixel-Boy (CC0)
  • Tiles by ArMM1998
  • shubibubi’s Cozy pixel-art packs (free versions), used for non-commercial purposes

Type

Typeset in Lora.

Saltmere Harbour at night

Thank you for playing.

The inspiration!

Release plan

Dawnshard Vale · drafted 13 Oct 2026 · dates are estimates, except 1 December

Releases 1 and 2 · one release

Foundations, a New Look and Inn Life

end Oct to ~22 Nov

Shipped to players together, but built and tested in three steps, in this order.

Step 1 · Foundations

Invisible to most players, but everything else rests on it. Playtest and back up saves before moving on.

  • Weekday clock and festival calendar
  • Save versioning and export/import
  • Mobile and tablet support touch controls and layout
  • Quest tracker, “what next?” hint and tutorial
  • PC display whole-number scaling (2x, 3x, 4x) to fit the window, fullscreen button, crisp edges, no smoothing
  • 2x zoom option closer view with a following camera; for phones and tablets

Step 2 · A New Look

Before Inn Life, so the new inn rooms are built in the new style.

  • SNES art direction pass native 16×16 art first, redraw the rest by hand; 32×32 icons in menus only; harmonise every other pack (buildings, props, furniture, animals) to the Mana Seed palette and shading so they match; style target: Gentle Forest (Seiken Densetsu 3 look) and the Mana Seed seasonal samples (true 16×16, usable tiles); layered grass and tree canopies, cliffs and ledges, soft shorelines, warm interior lighting, framed dialogue boxes and HUD, a deliberate palette per area; keep 16×16
  • Full-resolution interface layer world stays 400×300 at 2x; menus, text, HUD and dialogue drawn crisp at the full 800×600; framed parchment panels, tabbed inventory with icon tabs, equipment screen with the hero, speaker portraits overlapping the dialogue box, tidy HUD plaque and hotbar with control prompts; PC, touch and controller prompts; build first so every later screen uses it
  • New look: art packs and visual polish Tiny Top-Down Village buildings, Fishing Boats, Minifolks crowds, villagers from Tiny Neighbours, Super Retro World and Fantasy Dreamland, 32rogues animals and monsters, Cute Fantasy (style target: terrain, cliffs, shorelines, farm animals; non-commercial licence, check before shipping), Mystic Woods (water and stone bits only); Raven Fantasy Icons for items and inventory; Mana Seed Breakable Pots (Zelda-style pots that smash into pieces); Pixel Crawler stations and furniture (kept for Home and Farm); more animation, shadows, soft lighting, weather effects, crisp scaling
  • Our own villagers and hero about 24×32 characters (tiles stay 16×16), generated as 4-direction walk sheets, snapped to a real pixel grid and one palette; art done (13 Oct): hero 67 frames, 32 villagers, 30 monsters, as atlases; to wire into the game; a layered paper-doll pack can follow for the Release 8 creator

Step 3 · Inn Life

Open weekdays 12 to 1 and 7 to 10 in the evening, and all day at weekends.

  • Inn Life stage 1 rent a room, bard, rumours, regulars, house specials, darts, dice
  • Card games and draughts opponents with personalities; works by touch
  • Contests fishing, cooking, card tournaments; ranks, ribbons, trophies
  • Inn Life stage 2 arm wrestling, tall-tale contest, tournament nights, arcade-style horse racing
Release 3 · Chapter 4

The Christmas Winterland

live 1 Dec, closes midnight 31 Dec

A festive side quest, independent of the main story.

  • Christmas market and starter quest works for any save
  • Winterland zone snow terrain, Christmas Village pack, Mana Seed winter cliffs, trees and cave
  • Frost creatures wolves, polar bears, frost slimes, frost golem; recoloured from our own monster sheet, animated by code
  • Cutscene engine and arrival scene
  • Festive rewards decorations, your Santa icon, trophies kept after it closes
Release 4

Seasons and Companions

~mid Jan

The world starts to live and change.

  • Seasons crops, fish, forage and wildlife change; Mana Seed spring, summer, autumn and winter tile samples as the look
  • Companion follows you, with a friendship level
  • Bestiary fills in as you meet and defeat creatures; our own 30-creature monster sheet
  • Berries growing system tied to farm, potions and cooking
Release 5 · Chapter 3

The Hollow King

~Feb

The main story returns: a choice, not a fight.

  • Chapter 3: the Hollow King and the third Shard the choice and its outcomes
  • New dungeon with a new tool 2D Pixel Dungeon pack: tiles, chests, torches, traps
  • Hot air balloon over the fogbank to the Hollow Keep
  • 3D flight view for balloon flights, with a 2D fallback
  • Story cutscenes each Shard and the choice
Release 6

Home and Farm

~Mar

A place that is yours.

  • Buy land and build your home benches, rest, journal, storage; Pixel Crawler stations and furniture
  • Secret base decorate with Interior pack furniture
  • Farm animals and artisan goods Farm RPG Tiny pack crops and animals, Cute Fantasy animals
  • Heart events, birthdays and favourite gifts
Release 7

Depth and Discovery

~Apr

Endless things to do after the story.

  • Procedural dungeon and timed mini-dungeons
  • Day/night and weekday creatures and a Safari-style area
  • Final Fantasy III jobs and elemental magic
  • Restoration goal collect sets to rebuild part of the village
  • Museum donate artifacts and rare finds
Release 8

Heroes

~May

Make the hero yours.

  • New-game screen and character creator name, male or female, creator; Mana Seed Character Base (paper-doll hero with sword and shield, hair and outfit layers)
  • Party members and summons
  • Mini and toad forms transformation puzzles
  • 3D sea voyages

Every release also includes

  • Save migration check, balance pass, playtest
  • Manual and advert update (batched), changelog
  • Asset register updated, and authors credited on the credits screen (register)
  • Ship each feature small first, then deepen it

Later, not scheduled

  • Mailbox, weather forecast and luck, mounts, special orders, helper sprites, more tool upgrades
  • Full 3D (HD-2D) view; cloud saves and leaderboards

Notes

Releases 1 and 2 ship together as one release. Inn Life is a priority, ahead of the winterland. Chapter 3 stays at about February.

Releases 1 and 2 together are tight for 1 December. If time runs short, move Contests and Inn Life stage 2 (including horse racing) to Release 4 first.